Alt-Text Optimizer Pro - Generating alt texts
Generate alt texts for single images or for several media items at once.
Now for the fun part: generating alt texts. It all happens conveniently in a dedicated area of the administration – no programming involved. You see at a glance which images are still missing an alt text, select them and have them described.
Opening the area
In the administration, open Content → Alt-Text Optimizer Pro.
At the top you'll see a status:
- Ready – everything is configured, you can get going.
- Not configured – the OpenAI key or the model is missing. Sort that out in the configuration.
Below that, the overview shows how many images are still without an alt text, how many already have AI texts and how many you currently have selected. In shops with several languages the language coverage card joins in – it shows how far along your media library is per language (more on that under multilingual alt texts).
Understanding the two tabs
The area has two tabs:
- Without alt text – every image that doesn't have an alt text yet ends up here. This is your to-do list.
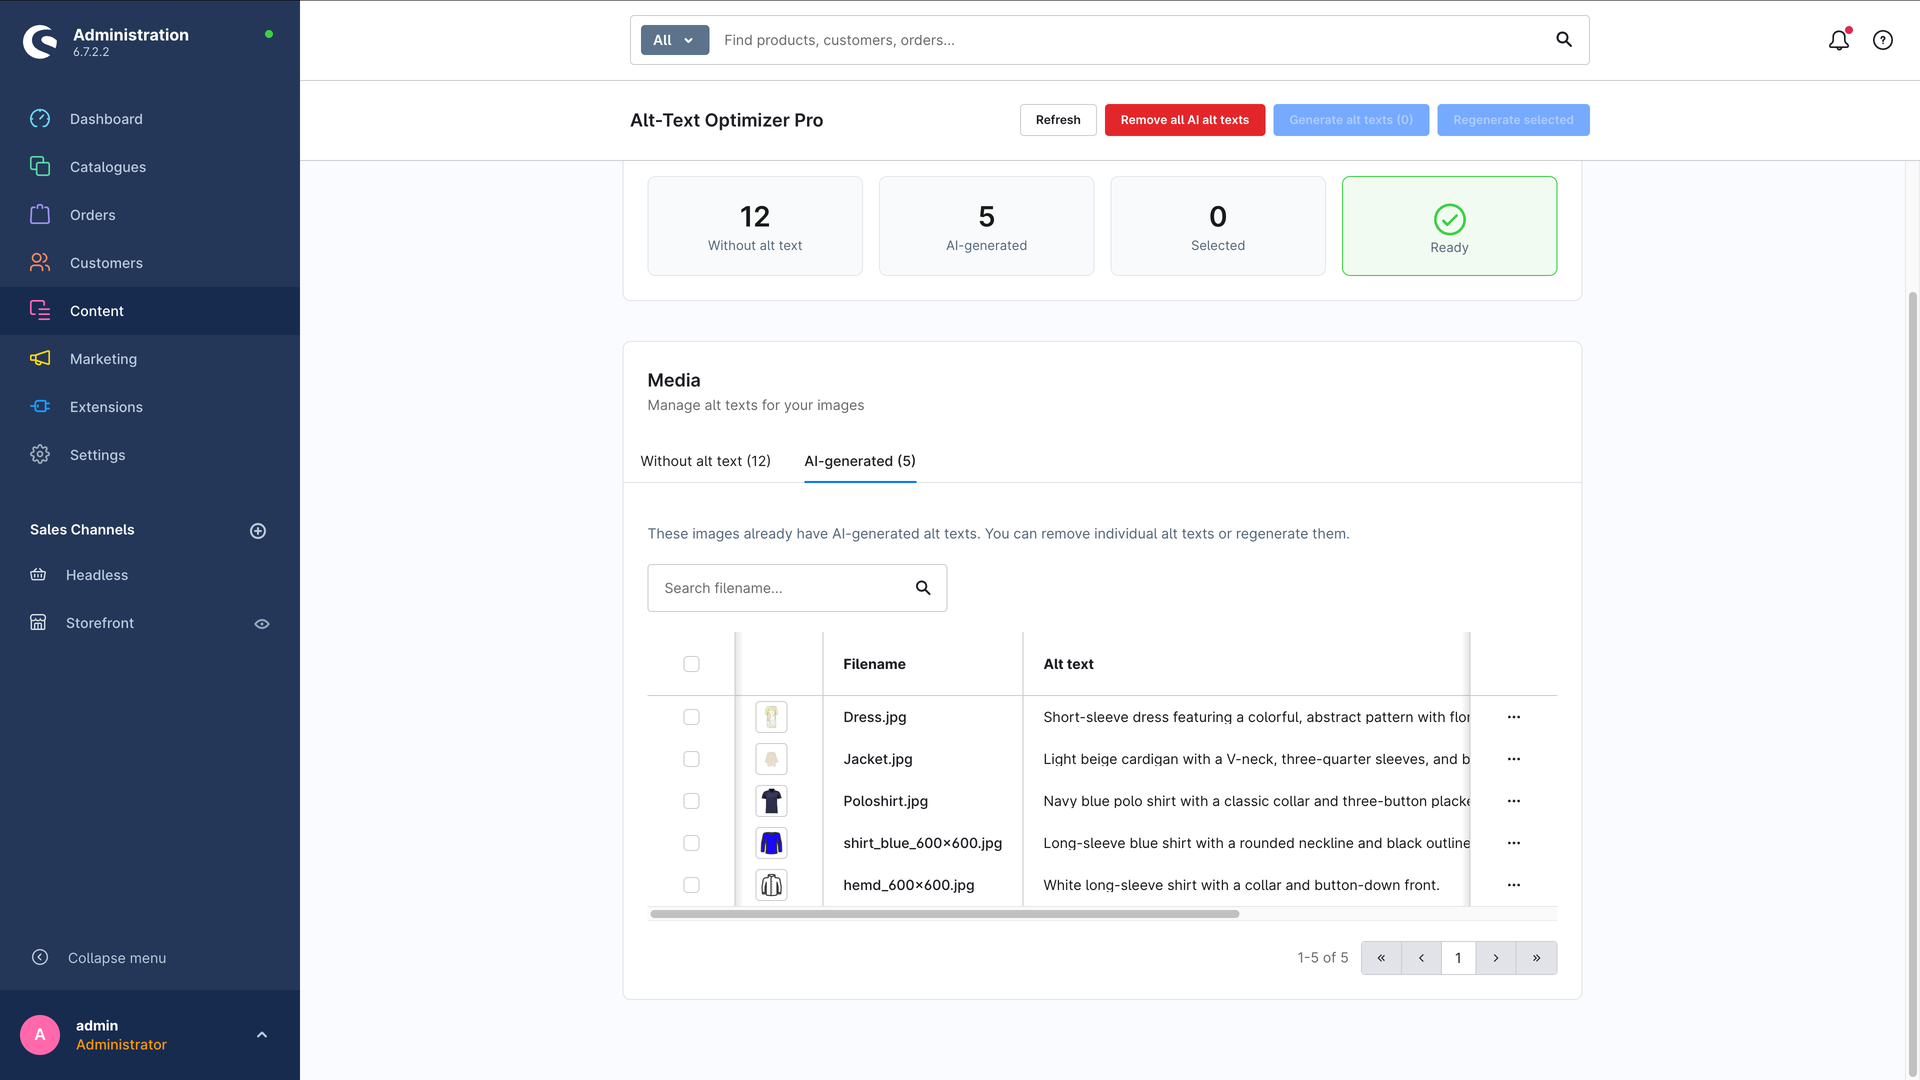
- AI-generated – here you see all images whose alt text was created by the plugin. That keeps you on top of things and lets you regenerate or remove texts whenever you need to.
The search field helps you find images quickly by file name.
If your shop has more than one language, the first tab is called "Language missing": it then lists every image missing a text in at least one language – even if it has had one in another language for ages. On top of that you get a "Languages" column with coloured badges and a language filter.
Generating alt texts
You have four options:
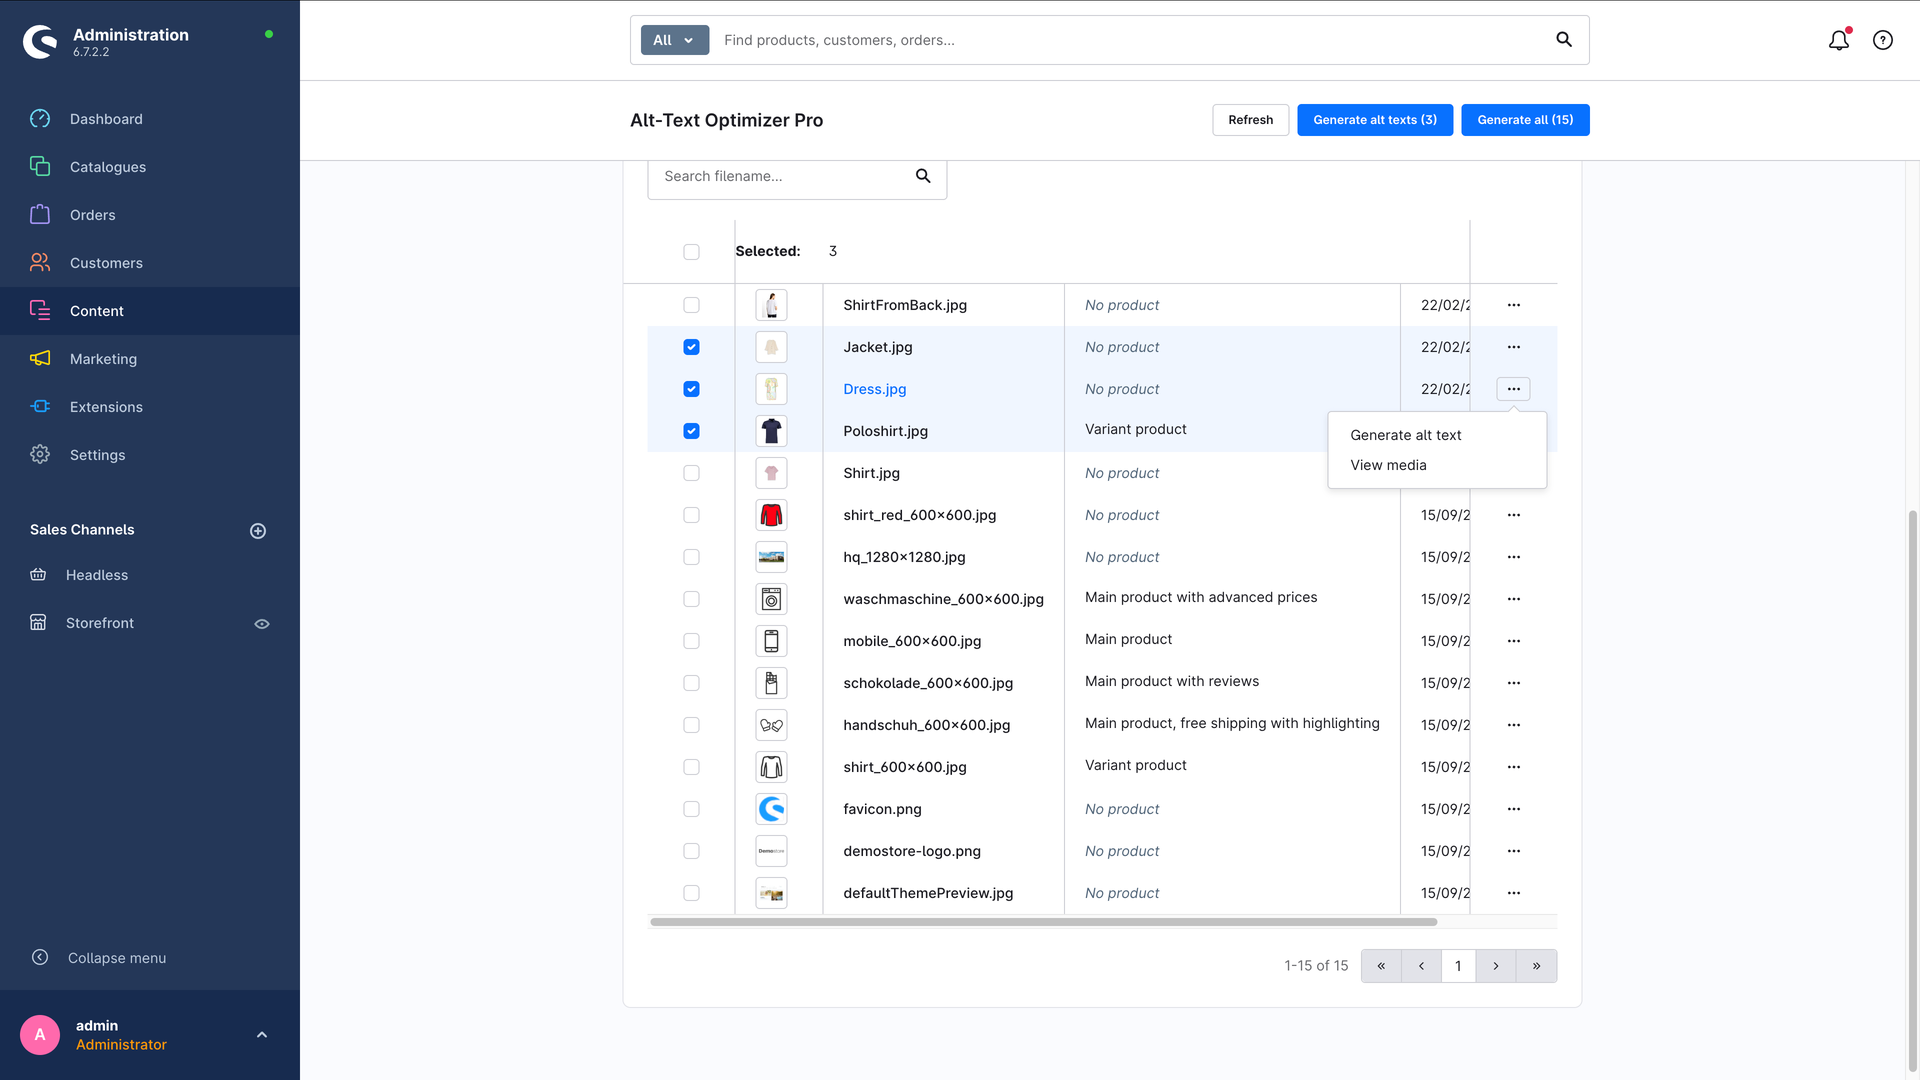
- A single image: click Generate alt text in the image's row.
- Several images: tick the checkboxes on the left for the images you want, then click Generate alt texts.
- All at once: Generate all processes every image in the current tab (see the note on the limit below).
- In the background: Generate in background hands the run over to the message queue so you can close the tab – ideal for large media libraries. Details in the background & scheduled runs chapter.
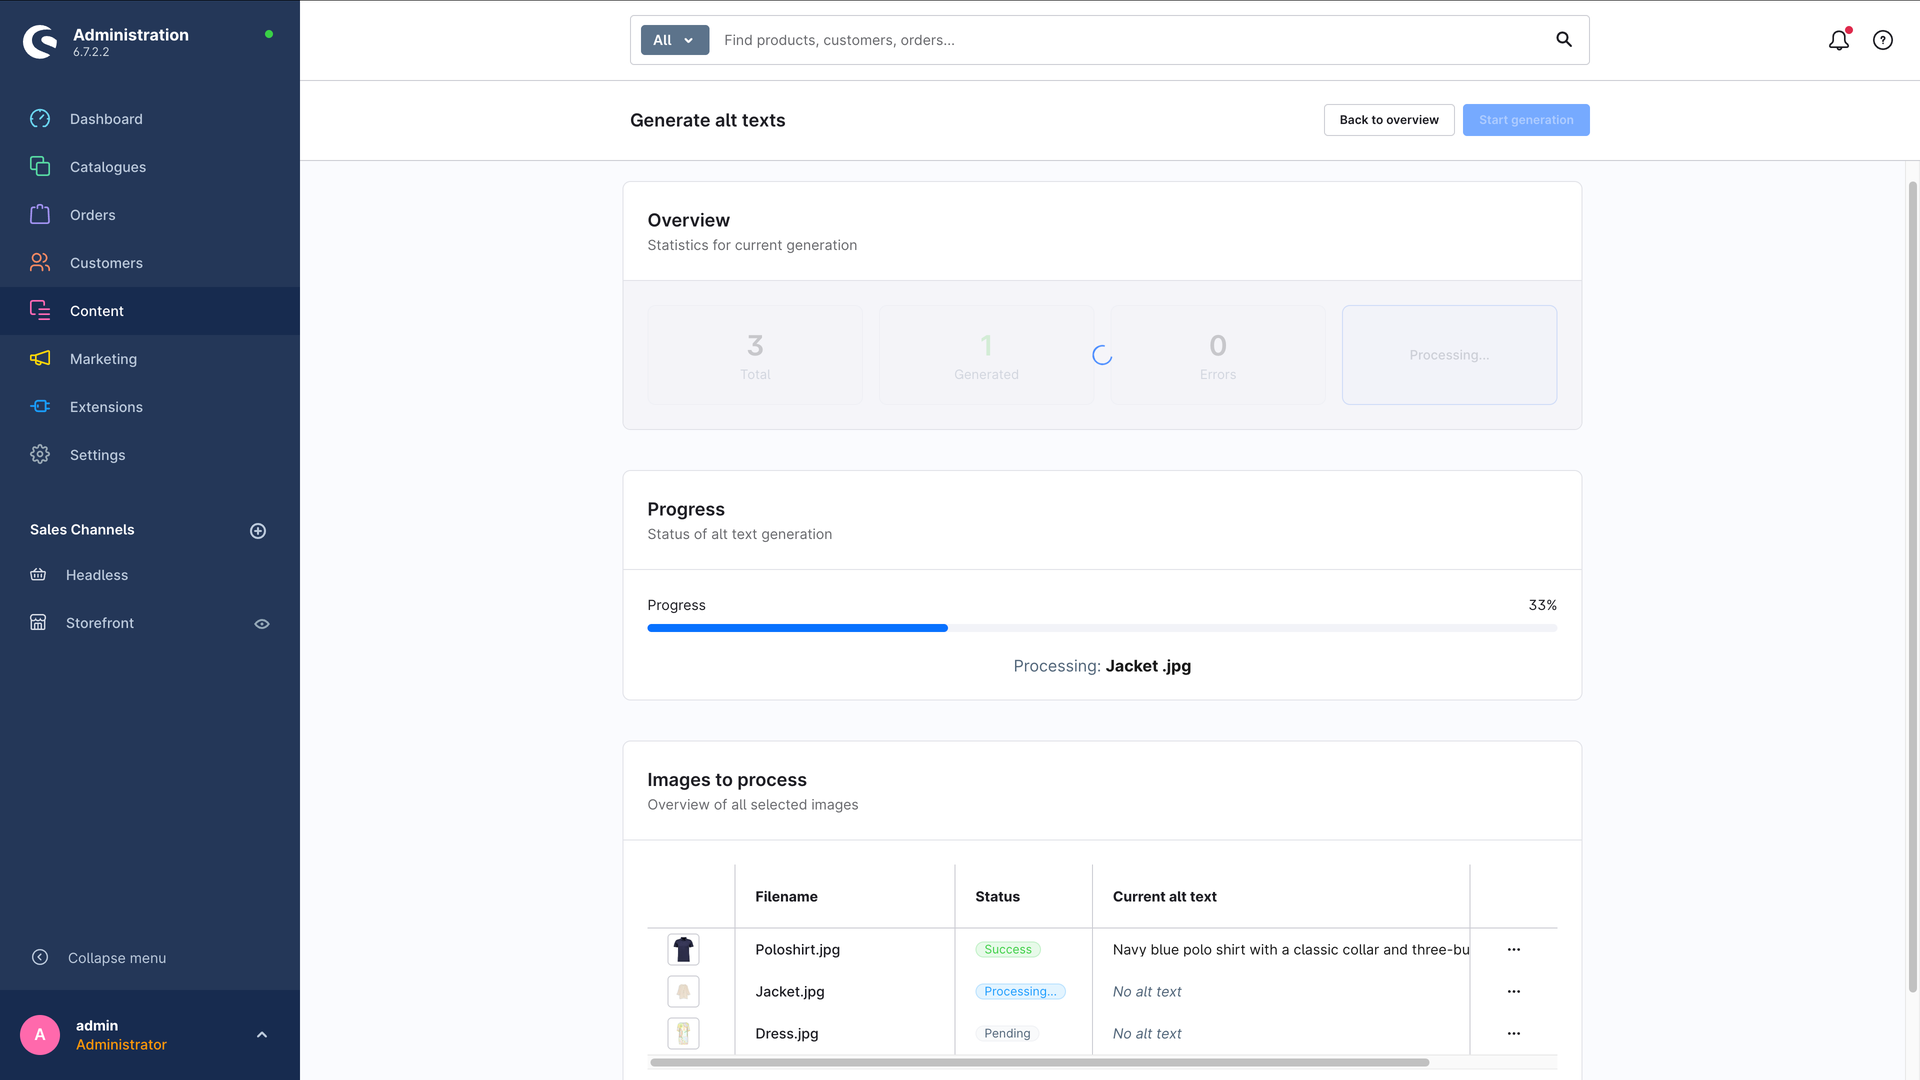
The generation page then opens. Right at the top you'll find the target languages for the upcoming run – prefilled with what you chose in the configuration, but changeable for this one run at any time. Below that, a coloured notice tells you what is about to happen:
- "Languages that already have an alt text are skipped automatically – no change, no API cost." → the gentle default.
- "Existing alt texts will be regenerated and overwritten in the selected languages." → the deliberate overwrite mode.
Once started, you see the status of each image – pending, processing, successful or error – along with a progress bar. The images are processed one after another, so larger batches take a moment. At the end you get a summary with total, generated, errors and skipped. With several languages the result is reported per image and language.
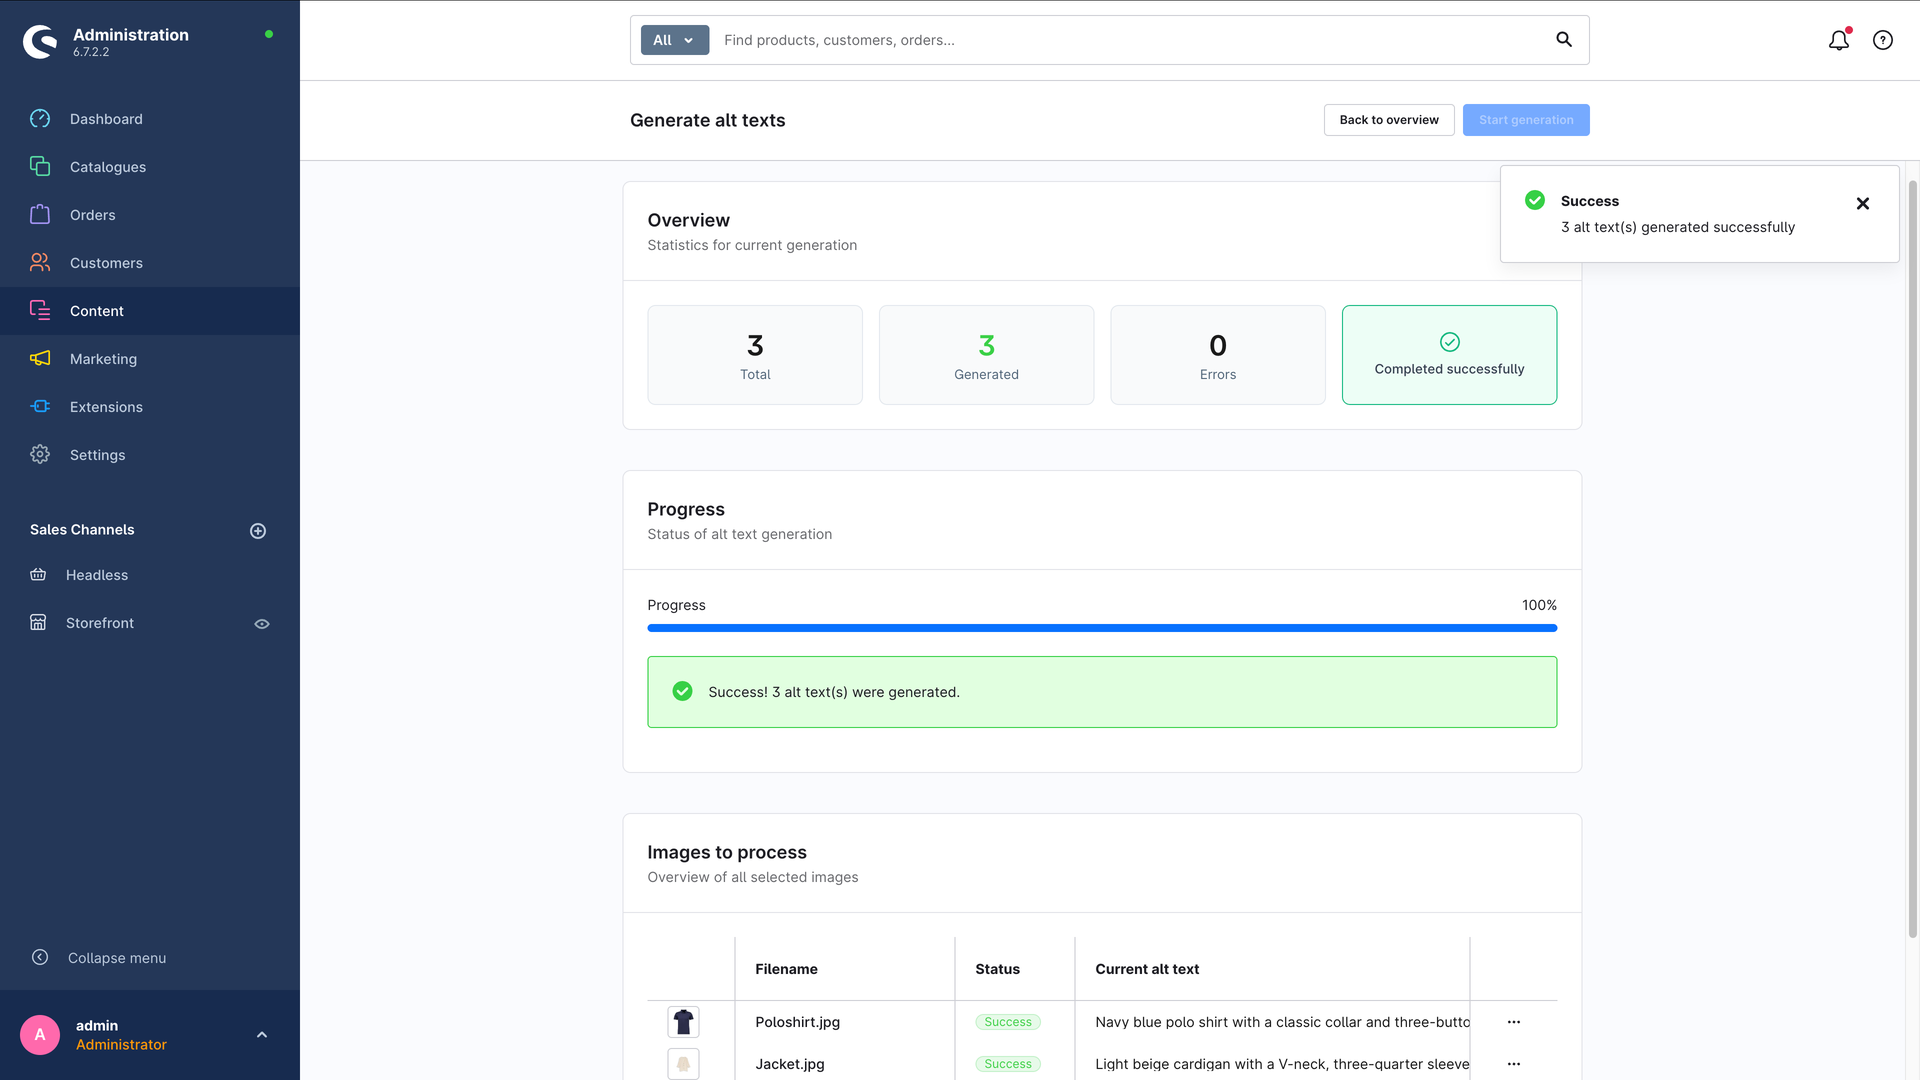
Limit per run: 100 images. If you select more, the plugin processes the first 100 and lets you know. Just work through large media libraries in several runs – that also keeps results and cost easy to follow.
Reviewing, regenerating or removing texts
In the AI-generated tab you can at any time:
- regenerate a text (after changing the length or language, for example),
- remove an alt text again – the image then reappears under Without alt text.
For the big spring clean there's also "Remove all AI alt texts" at the top. The action deletes exactly the texts the plugin wrote – alt texts you maintained by hand stay untouched. With several languages it always covers all languages the plugin generated in; the confirmation dialog tells you so beforehand.
So you stay in charge of the texts at all times. And of course you can still edit an alt text by hand directly on the media item.
Quick action in the media library
For individual images you don't need the module at all: the media sidebar holds the quick action "Generate AI alt text". It creates the text for the selected image in all configured target languages. If alt texts already exist, a confirmation dialog asks before overwriting.
What you should know
Existing alt texts stay put by default. As long as the "Skip existing alt texts" option is enabled (the default), the plugin only generates what is actually missing – existing texts are neither overwritten nor do they cost you API fees. You can overwrite deliberately via "Regenerate" in the "AI-generated" tab; the generation page always shows which of the two behaviours is currently in effect before you start.
- Only images are processed. Supported are JPG, PNG, GIF and WebP. Other files (PDFs, videos, SVG) are skipped with a message.
- The image file must be reachable. It has to physically live in your shop's
publicfolder. With offloaded storage (external CDN/cloud storage) the image must be retrievable via its URL. - Very large files (over 20 MB) are skipped.
- OpenAI daily limits: with a lot of images in a short time, OpenAI may slow you down ("rate limit"). Just wait a moment and start again.
Where does the alt text end up?
The finished text is saved in the normal alt text field of the image in Shopware – more precisely, as a media translation in the respective language. It is live in your shop immediately, exactly as if you had typed it in by hand. On top of that the plugin remembers (via an invisible field) that the text came from the AI, so it shows up in the AI-generated tab.
Because the texts are ordinary shop content, they also survive uninstalling the plugin – in every language, and regardless of the "remove all data" option (which only concerns the plugin's own structures such as history tables and custom field definitions). If you really want them gone, use "Remove all AI alt texts" beforehand.
For developers: API endpoints
You only need this section for your own integrations or automations. It is not relevant for normal use in the admin area.
The plugin exposes two admin API routes, the same ones the interface uses.
Generate an alt text for a single media item:
POST /api/_action/ai-alttext/generate-single
Content-Type: application/json

{
  "mediaId": "0188f...",
  "salesChannelId": null
}
Success response:
{
  "success": true,
  "mediaId": "0188f...",
  "altText": "Schwarze Laufschuhe mit weißer Sohle auf hellem Hintergrund"
}
Check the configuration:
GET /api/_action/ai-alttext/check-config?salesChannelId=...
{
  "valid": true,
  "model": "gpt-4o-mini"
}
If something fails, the routes respond with success: false or valid: false
and a meaningful message. The most common causes are listed under
troubleshooting.