Right to Repair & EmpCo: Claims and Repairability - Managing claims
The remedy workflow end to end: create, give notice, confirm the remedy, complete – including the 12-month extension.
This page walks you through one claim from start to finish: logging it, the four statuses, the right to choose between repair and replacement, and how the warranty gets extended after a repair.
Find your claims
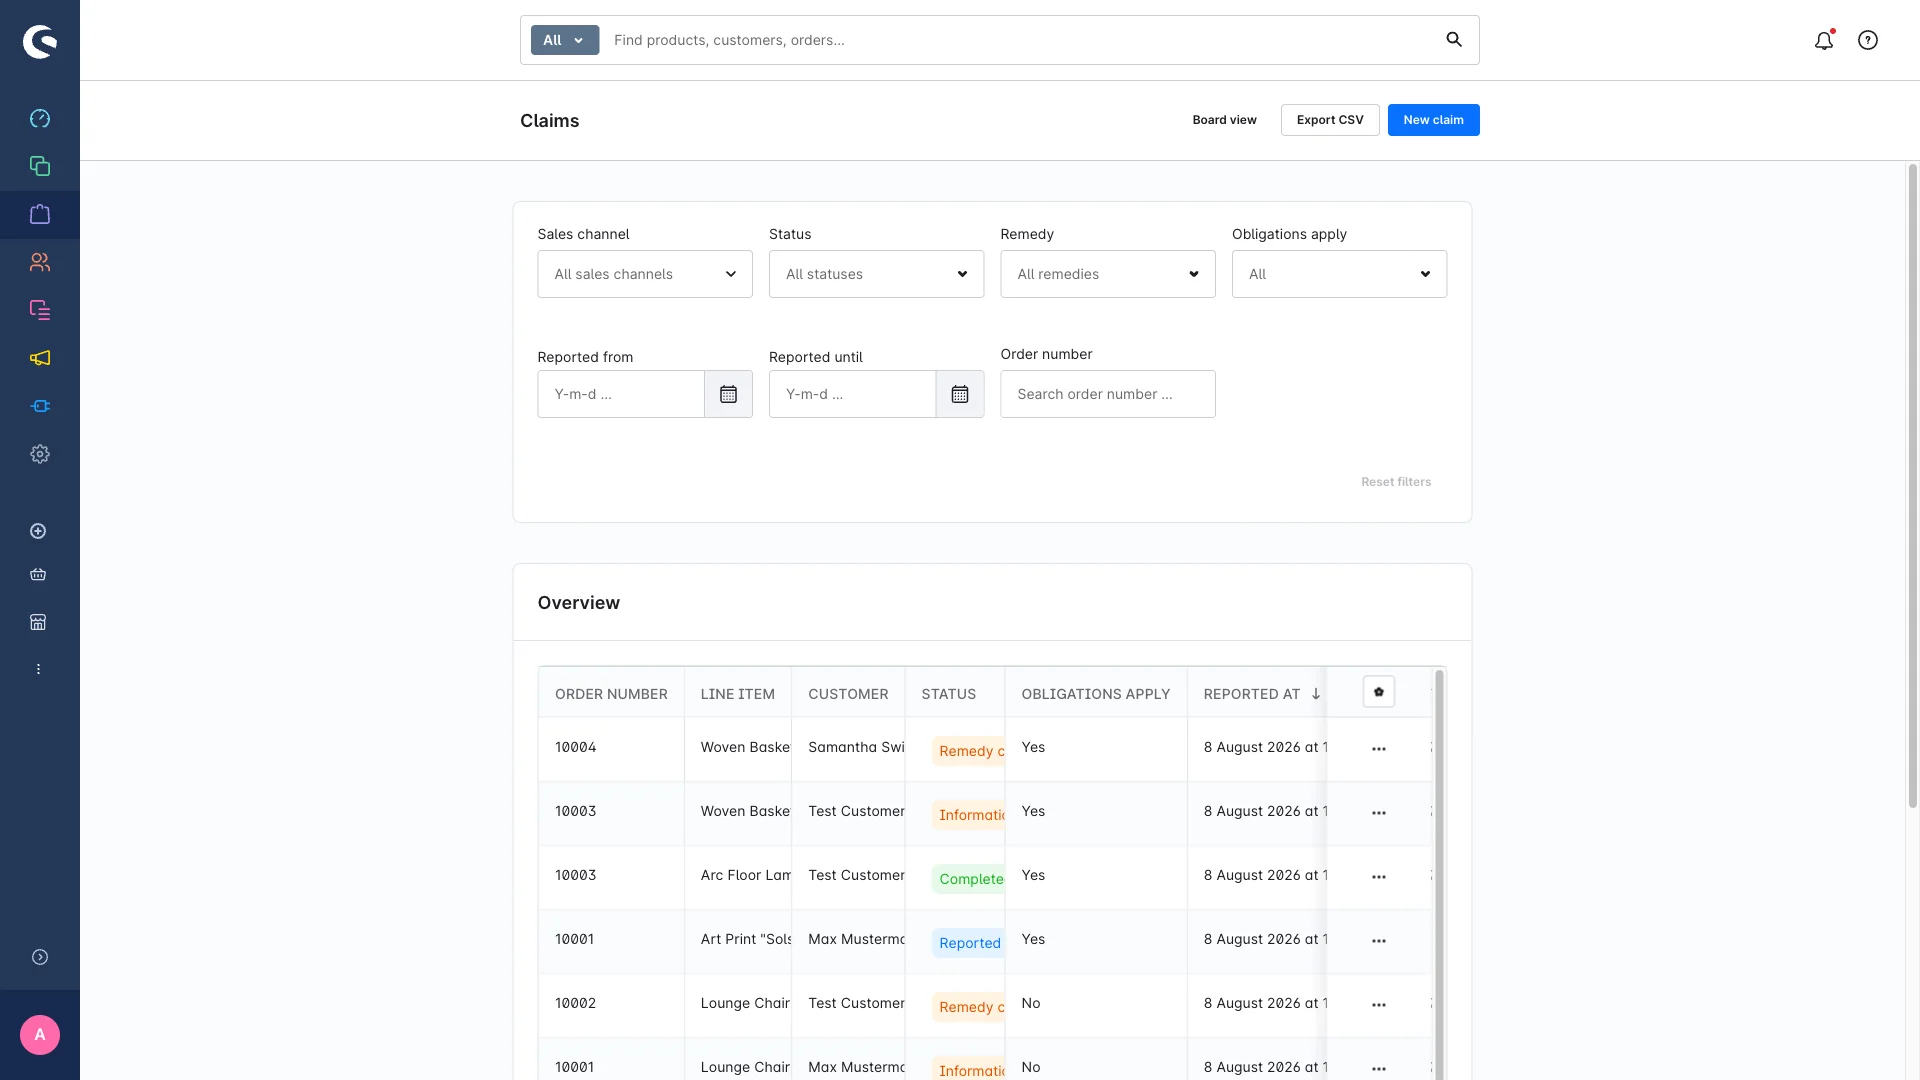
The module lives under Orders → Claims. On the Overview page, click Claims in the top right. You land in the list.
| Column | What it shows |
|---|---|
| Order number | Which order the claim belongs to |
| Line item | Which item of the order is affected |
| Status | Where the claim currently stands |
| Obligations apply | "Yes" = eligible, "No" = voluntary |
| Notice given on | When the customer was told about their right to choose |
| Warranty extended until | The new end date, if an extension was applied |
Use the search field Search order number … and the filters to narrow the list down – the details are in Kanban board. Click a row (or use View in the row's context menu) to open the detail page.
Step 1: Log a new claim
When a customer gets in touch by phone or email, you log the claim in the admin.
Step 1: Open the Claims list.
Step 2: Click New claim in the top right.
Step 3: Pick the order.
Step 4: Pick the line item – the affected article within that order.
Step 5: In Affected quantity, enter how many units of that line item are defective (for example "2 of 4 units"). The field is validated against the ordered quantity, so you can't enter more than was bought. The default is 1.
Step 6: Confirm. The claim is created with the status Reported.
Creating claims requires the Create permission – see User permissions. You can also import claims in bulk from another system by CSV, see Import & export.
Two ways this happens without you
You don't have to log every claim by hand:
- Your customer reports it. If Report a defect in the customer account is on (it is by default), your customers get a form in their account and report the defect themselves. The claim is created with the same status Reported and runs through exactly the same workflow. See Customer account & storefront.
- A Flow Builder action creates it. The action Create claim logs claims automatically – triggered, for example, as soon as an order reaches a certain return status. See Notifications & log.
Eligible or voluntary?
When a claim is created, the extension compares the order date with your cut-off date for claims obligations (default 31 July 2026, adjustable per sales channel).
- Order date on or after the cut-off → eligible. The statutory obligations apply. The list shows "Yes" under Obligations apply.
- Order date before it → the setting Pre-mark new claims as eligible decides. Out of the box that setting is off, so the claim counts as voluntary ("Obligations apply = No").
What does voluntary mean? You can still run every workflow step – you're just not legally required to. The detail page shows a banner "Order before cut-off date – obligations do not apply", and board cards and the customer account show a Voluntary marker. Voluntary claims also get no 12-month extension.
Not legal advice: "Obligations apply" is a pre-fill derived from the order date, not a legal assessment. Whether an individual claim is actually covered is yours to judge.
The four statuses
| Status | What it means |
|---|---|
| Reported | The claim is logged, nothing has been done yet. The starting point of every claim. |
| Notice given | The customer was told about their right to choose between repair and replacement. |
| Remedy chosen | It's decided: repair or replacement. |
| Closed | The claim is done. |
Step 2 to 5: The detail page
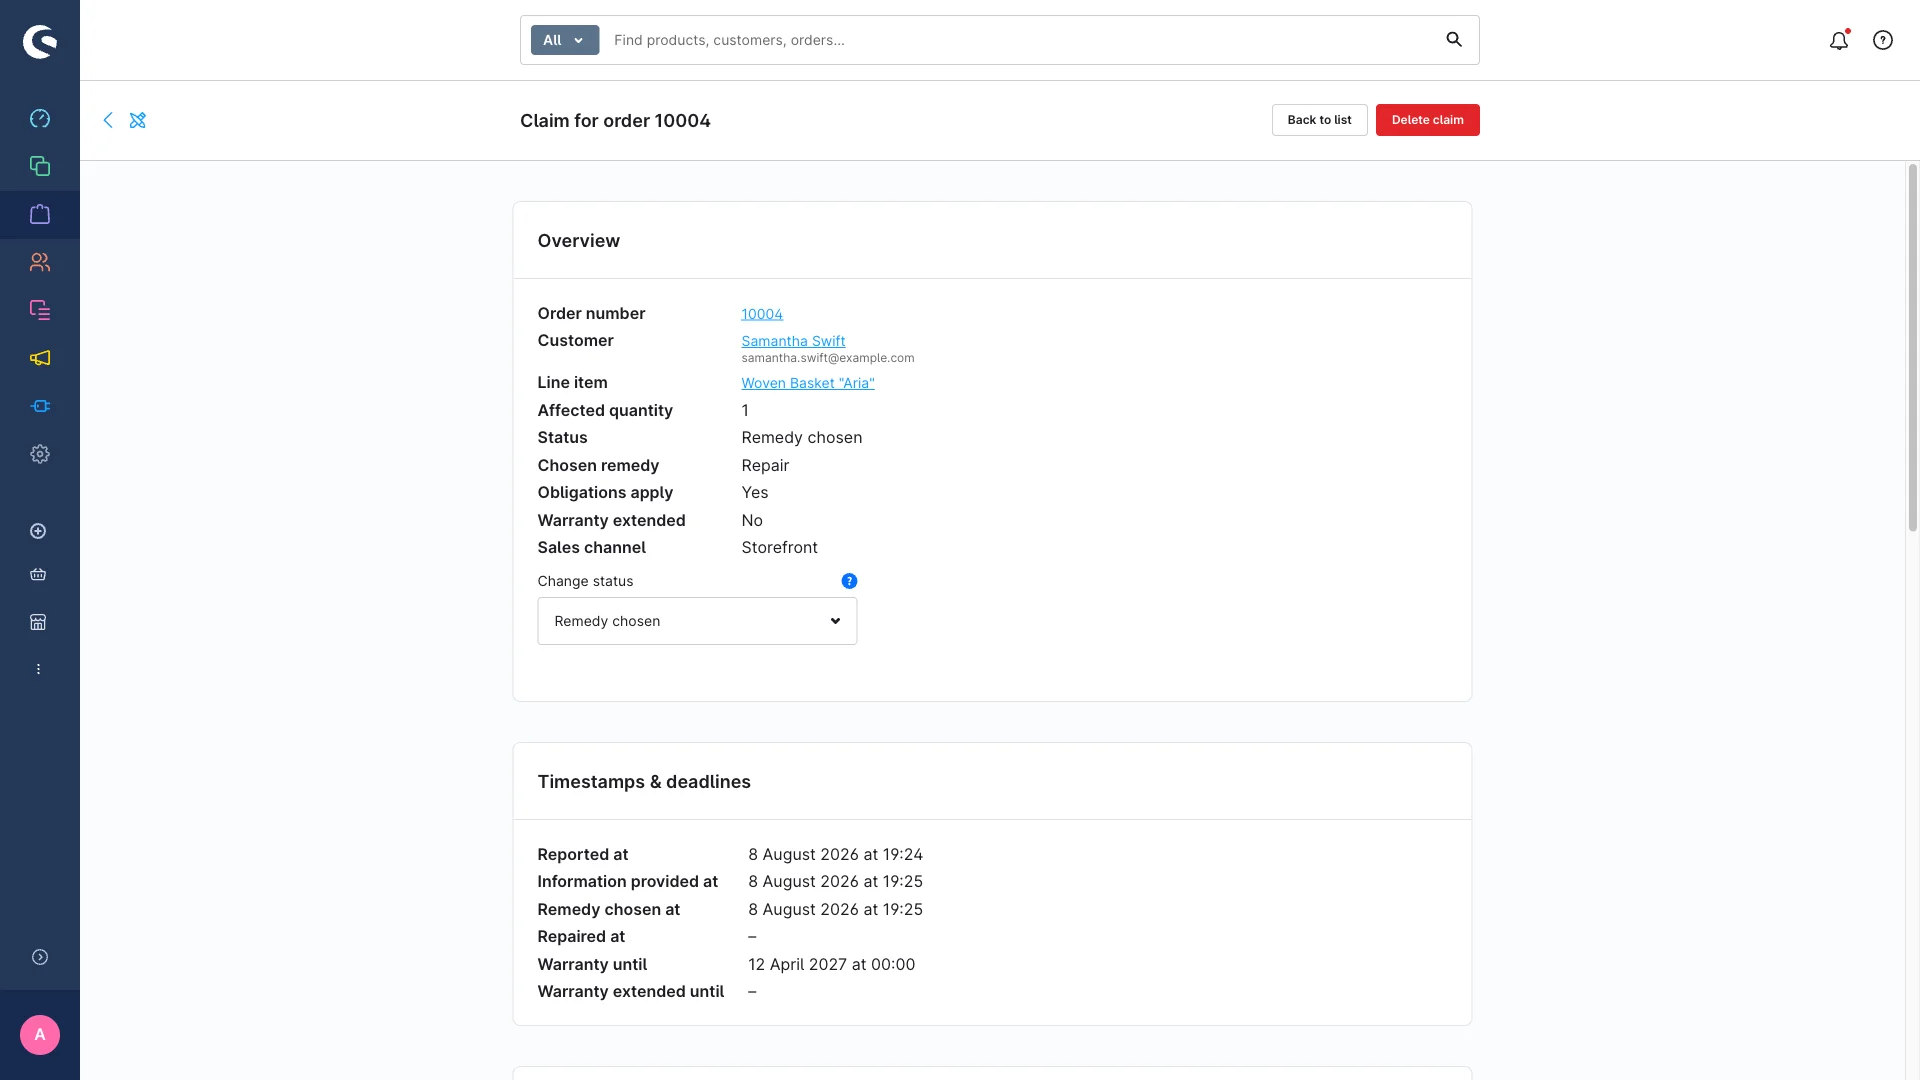
Click a claim in the list to open the detail page. Back to list takes you back. If the claim no longer exists, the page shows a Claim not found notice with a button back to the list.
The page has three areas:
- Overview – order, customer, line item, affected quantity, status, chosen remedy, whether it's eligible, whether the warranty was already extended and the sales channel. Order number, customer name and line item label are direct links into the order, customer and product pages; the customer's email address sits below their name.
- Timestamps & deadlines – every date that's been set (reported, notice given, remedy chosen, repaired, warranty until, extended until).
- Workflow – where you run the steps.
The order itself shows the other direction too: a Claims for this order card lists every claim on its line items with status and a direct link.
Without the Edit permission you can see the workflow but not run any steps (you'll get a "You're missing the 'Edit' permission…" notice). See User permissions.
Preview the emails first
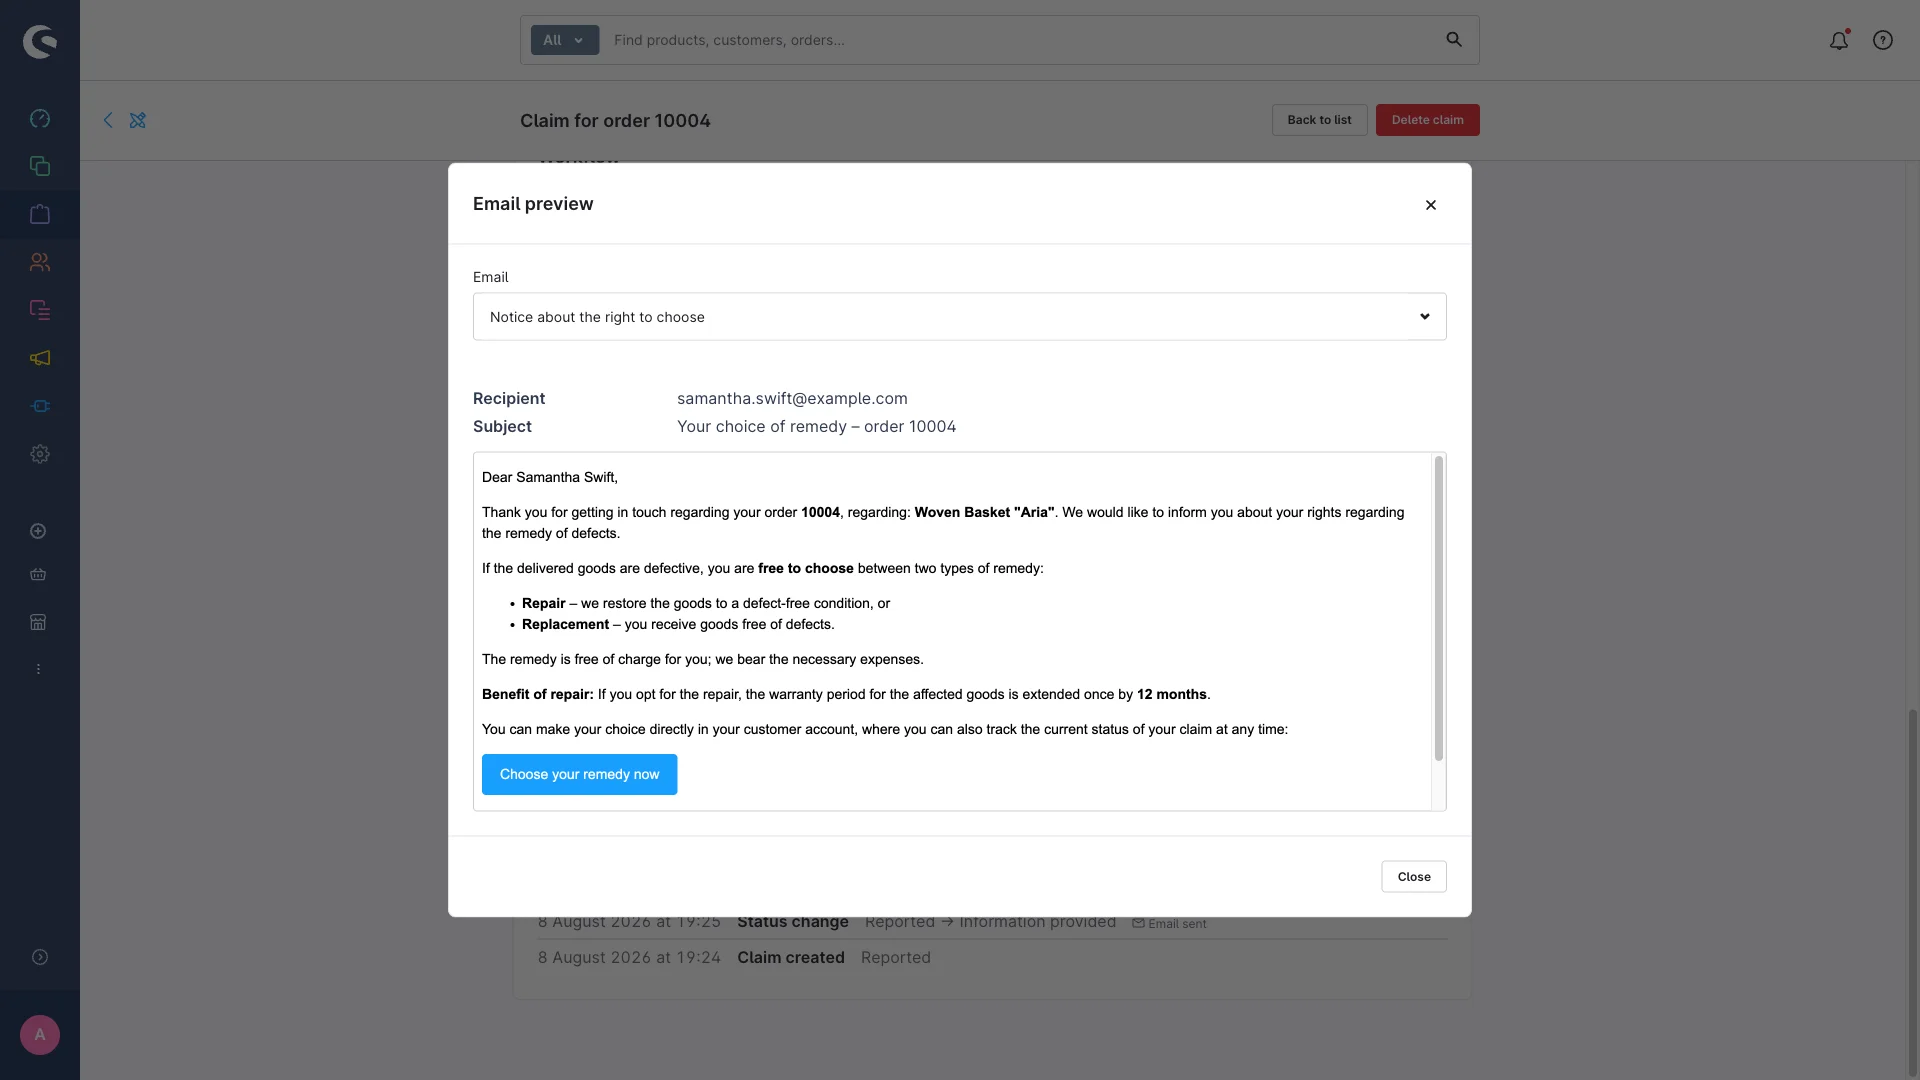
The Email preview button in the workflow card shows you exactly what the customer emails for this case would look like – without sending anything. It renders all three customer email types (notice about the right to choose, confirmation of the chosen remedy, closing confirmation) with subject, recipient and the real data of this claim.
Use it to check your snippet or template edits before a workflow step actually sends something.
Give the notice (send email)
- When: from the status Reported.
- What happens: the status moves to Notice given and the timestamp "Notice given on" is set. If email sending is on, the customer gets an email about their right to choose.
- Important: the timestamp is always set – even if the email fails. In that case you get a separate warning so you can inform the customer another way. Your record stays complete either way.
- The email links the customer straight to the claim in their account, where they pick the remedy.
Confirm the choice
- When: from the status Notice given.
- What happens: you record the chosen remedy – repair or replacement – and confirm. The status moves to Remedy chosen, the timestamp "Remedy chosen on" is set, and if sending is on, a confirmation email goes out.
- Or let the customer decide. On the claim detail page in their account, a customer with a claim in Notice given sees two buttons – Choose repair and Choose replacement. Both routes are equivalent: same checks, same status and timestamp change, same log entry, same confirmation email.
Send instructions
- When: from the status Remedy chosen.
- What happens: if email sending is on, the customer gets the email with your handling instructions – return address, process, documents to include, turnaround time. The status does not change, and you can repeat this step as often as you like. Each send is logged separately.
Fill in the template before you send it the first time. The shipped mail template is deliberately a fill-in-the-blanks template with placeholders in square brackets, e.g. "[enter return address here]". Open it in the mail template management before your first send and replace them with your own details – otherwise the extension sends the placeholder lines as they are.
Mark as repaired
- When: from the status Remedy chosen.
- What happens: the timestamp "Repaired on" is set. If repair was chosen and the claim is eligible and not yet extended, the warranty is extended once by 12 months (see below). The success message names the new date – or tells you that no extension was applied.
Close
- When: from the status Remedy chosen.
- What happens: the status moves to Closed. If sending is on, a closing email goes out.
Repair or close? Per claim you usually use either "Mark as repaired" or "Close". "Mark as repaired" is the repair case with the extension; "Close" ends the case.
Changing the status freely
Besides the guided buttons, you can set the status directly in the overview card using the Change status dropdown – even out of the usual order, for corrections. The field needs the Edit permission.
Step 1: Pick the target status in Change status.
Step 2: A Confirm status change dialog opens.
Step 3: Moving to Remedy chosen? Then you also have to pick the remedy (repair or replacement) – the dialog can't be confirmed without it.
Step 4: Use the Notify customer by email switch to decide whether an email goes out. Timestamps are maintained either way.
Step 5: Confirm with Change status, or discard with Cancel.
Repair or replacement
When you confirm the choice, you decide how the remedy happens:
- Repair – the item gets fixed. Only here can the warranty be extended by 12 months.
- Replacement – the customer gets a new unit. No 12-month extension here.
The notice text your customers see in their account is editable through the
snippet vioveRepairCompliance.account.remedyNotice.
The 12-month warranty extension
When an item is repaired, the warranty is extended once by 12 months. That happens automatically on Mark as repaired (and equally when you drag a card to Closed on the board) – but only when all three conditions are met:
- The chosen remedy is repair, not replacement.
- The claim is eligible, not voluntary.
- It has not been extended before.
The maths: base deadline = order date + base warranty duration. The base is 24 months by default; if you stored a different duration for the destination country, that one wins. The 12 months are added on top. The new end date then appears in the Warranty extended until column and under "Timestamps & deadlines".
Every step is logged
Every status change writes an entry to the activity log automatically – action, old status, new status, plus extra details like the chosen remedy, whether an email went out and whether the extension was applied. You get a complete history without doing anything. More in Notifications & log.
Common questions about the flow
- Do I have to follow the order of the steps? On the detail page each button is only active from the matching status, which guides you safely through. If you want to work more freely, including going backwards, use the board and drag and drop.
- Does every step send an email? Only if Send notification emails is on in the configuration – and the texts are yours to edit.
- How do I export claims for my records? With the Export CSV button in the list – see Import & export.