Labelling AI product images in Shopware: how to get compliant in an afternoon
12 min read
by Marcel, Senior software engineer
Over the past few months you've been generating product imagery with Midjourney, DALL·E or Firefly – mood shots for category pages, cut-outs without a photo shoot, a few lifestyle scenes for your shopping experiences. Since 2 August 2026, the transparency obligations in Article 50 of the EU AI Act apply. And that leaves you with an uncomfortably concrete question: where exactly in Shopware do you record that an image came from an AI?
The short version
- The short answer: Shopware doesn't ship a field for AI labelling – you need an extension that stores an AI status on the media entity and turns it into a visible badge automatically.
- Four statuses: AI-generated, AI-manipulated (substantial), standard editing only, not AI – regular retouching stays badge-free.
- Set up once, then automatic: Folder defaults, a metadata scan with review queue and CSV import label even thousands of images – new uploads follow along on their own.
- The tool: Our EU AI Act Compliance plugin brings the badge, bulk labelling and evidence – configurable per sales channel.
Shopware doesn't ship a field for this. You need an extension that (1) stores an AI status on the media entity and (2) turns that into a visible notice in the storefront automatically – everywhere the image appears. The longer answer is this article: a step-by-step guide to setting it up properly, in a way that you do it exactly once and it keeps running on its own afterwards.
If you first want to know whether and for what the obligation applies to your shop at all, read our foundational piece on the AI content labelling obligation for online stores. This one is about implementation.
Which law applies here: The EU AI Act is a regulation and applies directly across the EU. The Shopware steps below are our implementation route, not a legal requirement in themselves.
The short version: what you actually do in Shopware
In three sentences: you set an AI status on every affected media file (AI-generated, AI-manipulated, standard editing only, or not AI). For images with an AI status, the shop automatically displays a transparency badge – in the listing, in the product gallery, in the zoom view and in shopping experiences. So that you don't do this 4,000 times by hand, you work with folder labelling, folder defaults, CSV import and a metadata scan.
The effort is distributed very unevenly: configuration takes you a solid hour, bulk-labelling your existing library another one or two – and everything after that happens automatically. That's exactly why "an afternoon" is in the headline.
The four AI statuses – and when to pick which
The real work here isn't technical, it's a judgement call: what counts as AI content in the first place? We deliberately boiled this down to four statuses in our plugin, because they cover just about every real-world case in a shop.
| Status | When to choose it | Badge in the shop? |
|---|---|---|
| Not AI | A normal photo or graphic, with no AI generation and no AI alteration. | No |
| Standard editing only | Ordinary image editing: cropping, colour correction, cut-outs, retouching – no AI generation. | No by default |
| AI-generated | The image was entirely or predominantly created by an AI. | Yes |
| AI-manipulated (substantially) | A real photo was substantially altered by AI – for example a real person placed into a different scene. | Yes |
"Standard editing only" is the status shop owners most often underestimate – and it's the most important one. It covers everything you've been doing for years anyway: open the image in Photoshop, pull the background to white, fix a colour cast, clone out a speck of dust. That is not AI manipulation that requires labelling, even though retouching tools now use AI internally. You document it internally – but the customer sees no badge.
Where's the line for "substantial" manipulation?
Here's the short answer: there's no millimetre-precise line, and we're not lawyers. The rule of thumb that has served us well in projects is to ask: does the edit change what the viewer believes to be real?
- Cutting out a shirt and correcting the white balance → standard editing.
- Smoothing wrinkles, harmonising colours → almost always standard editing.
- Using generative fill to put a skyline behind your real model that was never there → substantially manipulated.
- A fully synthetic "studio photo" from Midjourney → AI-generated.
When in doubt, label it. Nobody has ever been sued over one badge too many – over one too few, they have.
Step 1: labelling a single image
Let's start small so you can see the principle. You open an image – either in the media manager under Content → Media or directly in a product's images. In the sidebar you'll find the AI transparency section:
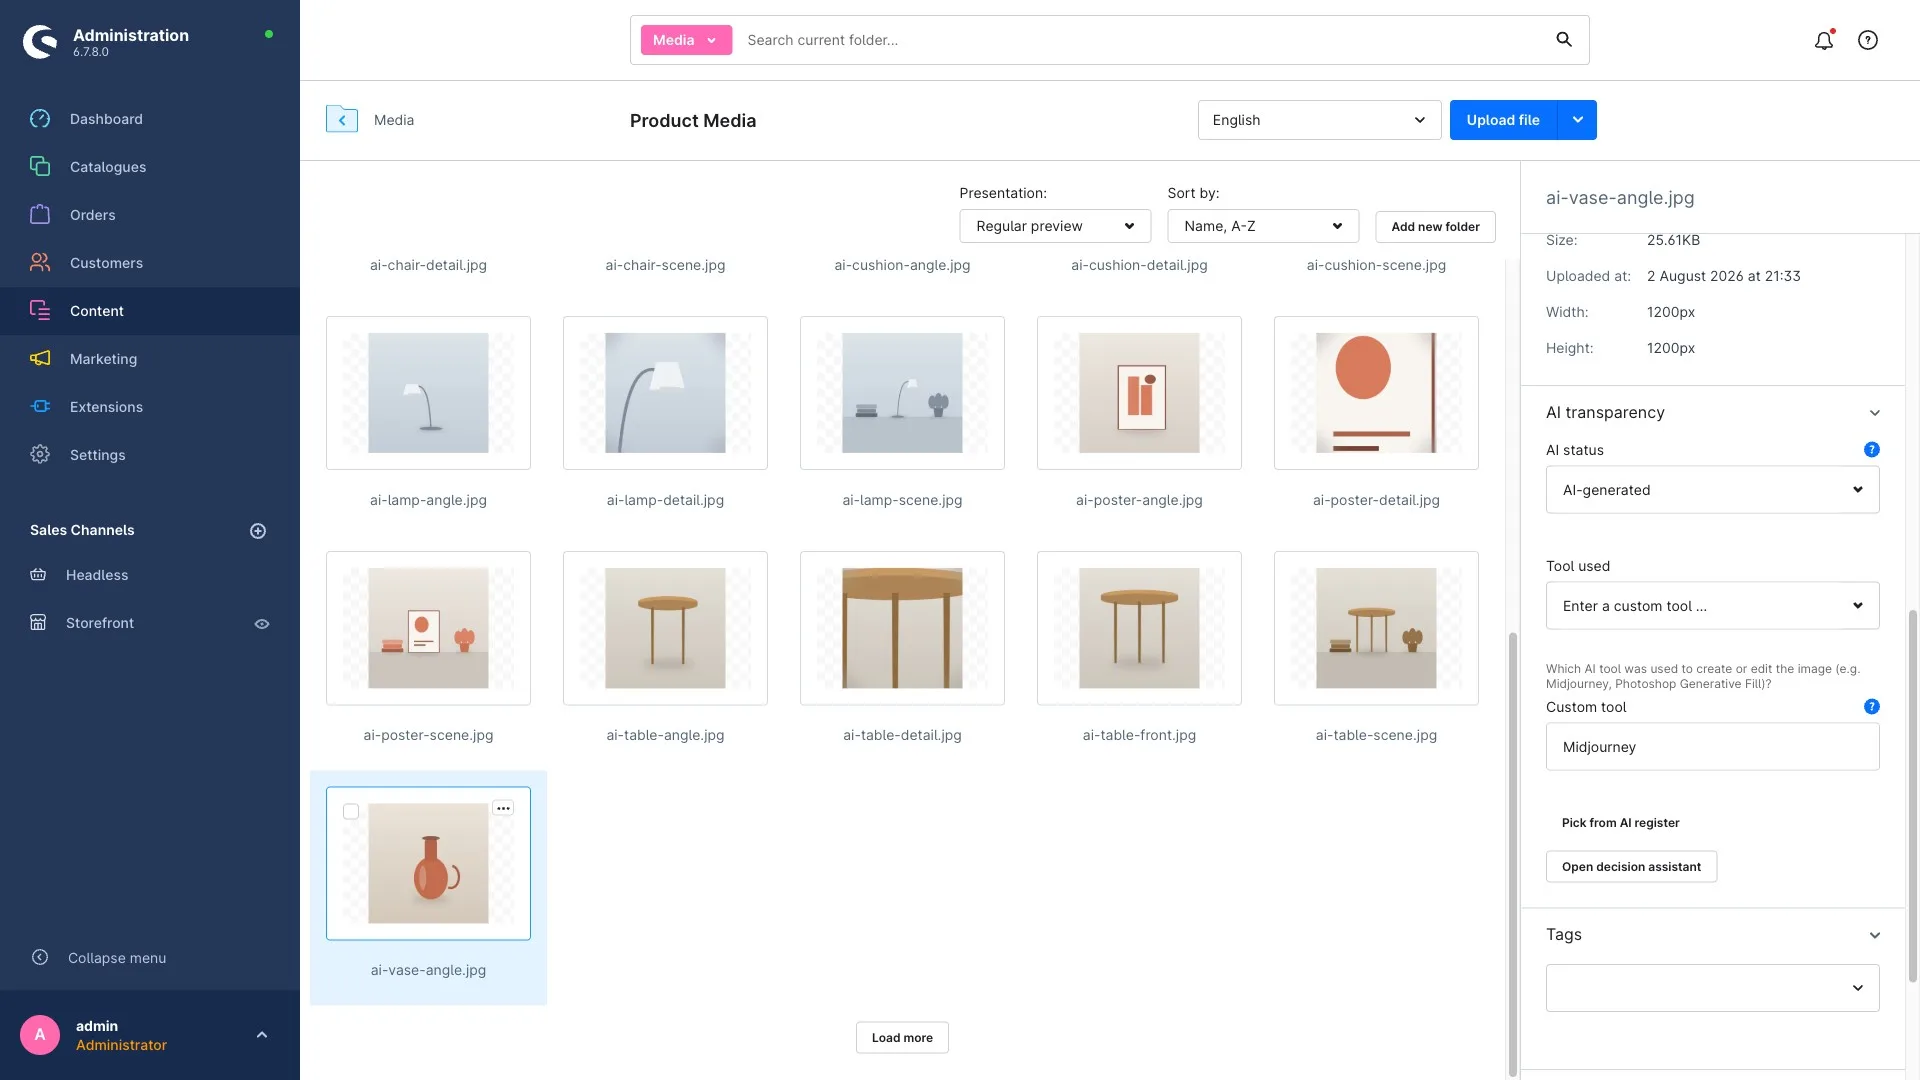
- Pick the AI status from the list.
- Optionally record the AI tool used, for example "Midjourney" or "DALL·E". This is gold for your internal documentation – and you can display it in the shop too if you want.
- Save. Done.
From that moment on, the badge appears automatically everywhere the image is rendered. You don't have to touch your theme, override Twig blocks or paste notices into descriptions.
The same works not just for images, but for self-hosted videos, embedded YouTube and Vimeo videos and audio files – AI-generated voiceovers, for instance. For videos, the badge sits on the video element; audio deliberately runs through the product-wide disclosure instead of its own badge, because nobody actually sees a badge on an audio player.
Step 2: scaling up – four routes for lots of images
Editing one image at a time is fine, but it's not a plan for 4,000 media files. For that there are four routes you combine depending on where you're starting from.
Route 1: folder labelling – the fastest fix for your existing library
All media in one media folder get the same status in one go. You pick the media folder, the status and optionally the tool in the tools area – confirm, done.
The trick here is organisational, not technical: create a dedicated media folder for AI images. If your AI mood shots are currently scattered across twelve folders, half an hour of tidying up before you label pays for itself. After that, your entire back catalogue is three clicks of work.
Route 2: folder defaults – so the work doesn't come back
This is the point where "tidy up once" turns into a permanently clean state. A folder default makes sure every new upload into a given folder automatically receives the configured status. You define which folder, which status, optionally which tool – and whether an existing status may be overwritten.
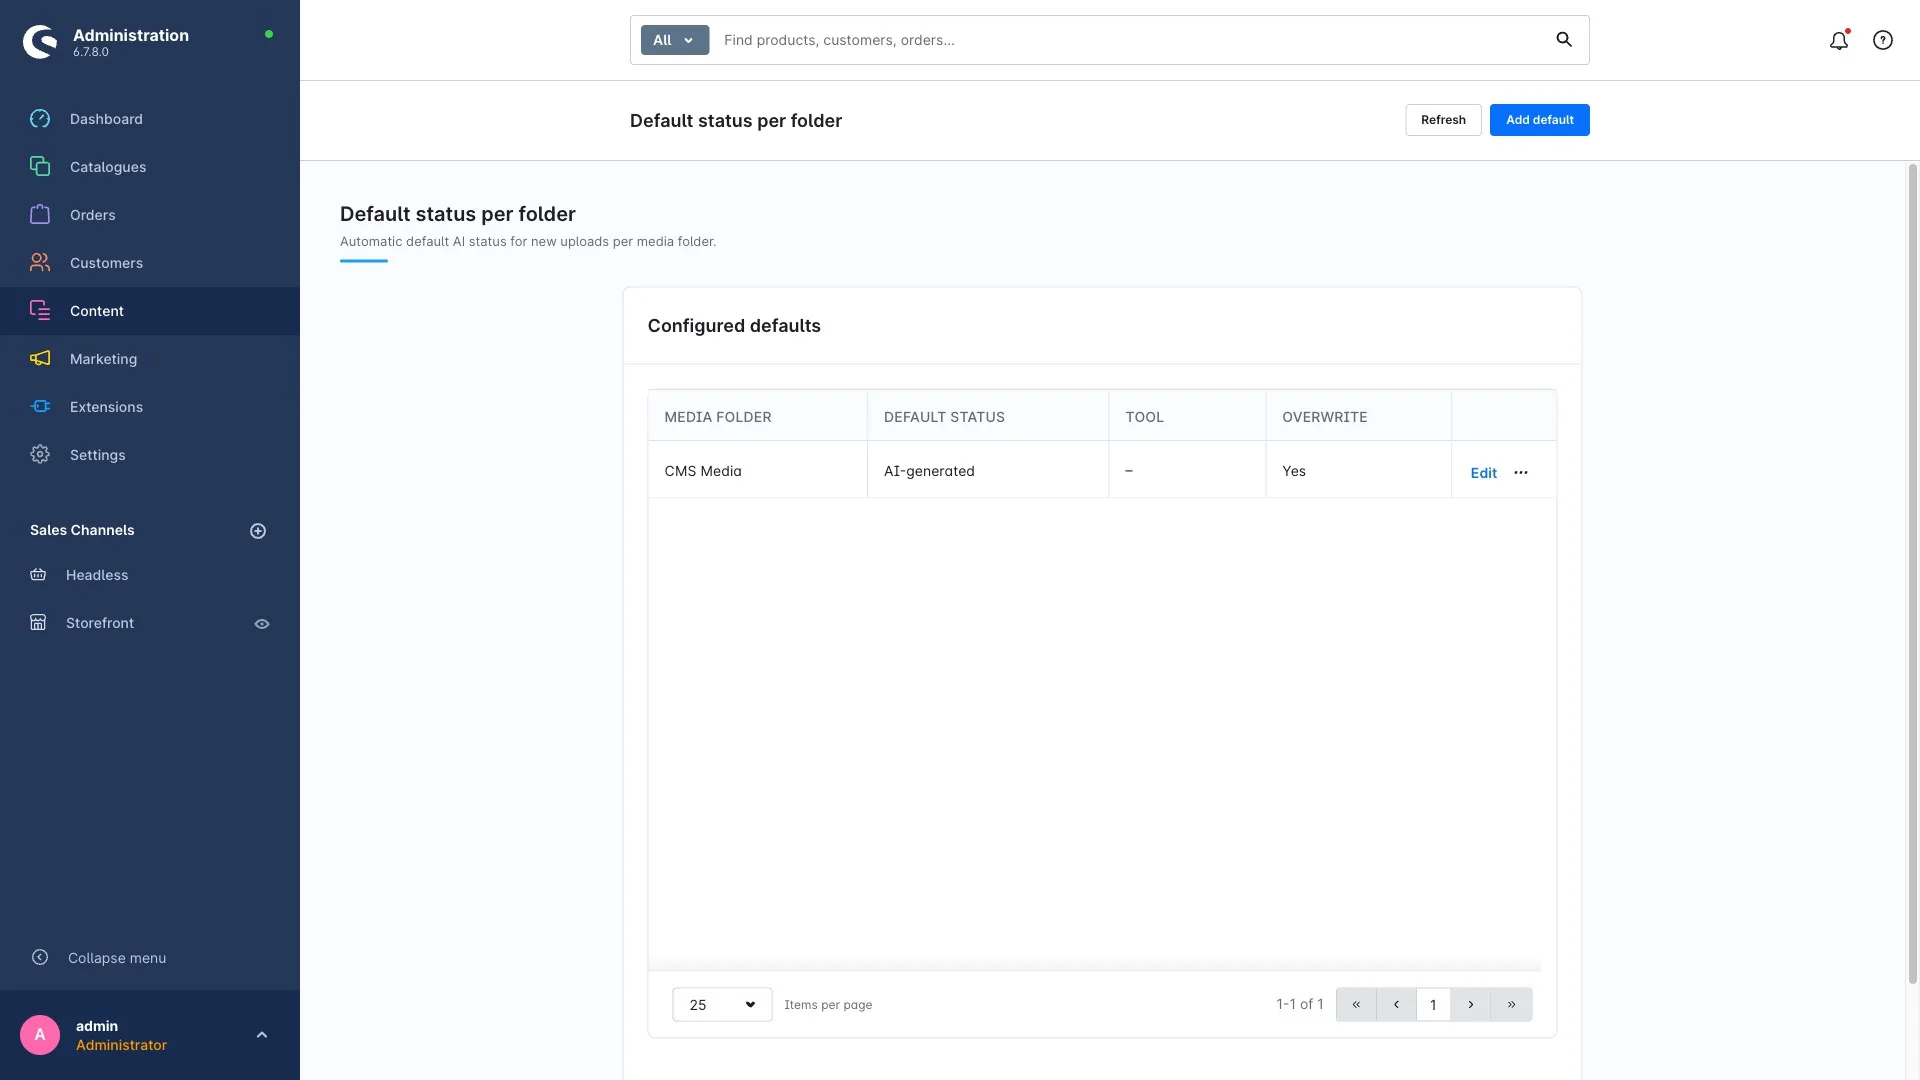
In practice this means your designer just keeps uploading. She doesn't have to remember which checkbox goes where – the folder handles it. Automations like this decide whether your compliance still holds up three months later or quietly rots away.
Route 3: CSV import – when the data lives somewhere else
If you already track your AI images in a spreadsheet, in your PIM or in an agency handover list, you can import the labelling as CSV. Each row identifies the media file one of three ways – by the technical media ID, by file name, or by product number plus image position – and specifies the desired status, optionally the tool.
This is the route we see most often in migrations and larger shops: a row reading "hero-banner.jpg | AI-generated | Midjourney" is enough to label that image correctly. It's also handy when an agency sends you a list of the AI assets they delivered.
Route 4: metadata scan with a review queue – the semi-automatic route
This is where it gets interesting. Many AI tools now write their own provenance into the image file:
- OpenAI (DALL·E / ChatGPT images) embeds C2PA Content Credentials – a cryptographically signed provenance manifest – and additionally sets the IPTC field
DigitalSourceTypetotrainedAlgorithmicMedia. - Adobe Firefly applies Content Credentials automatically to images whose pixels were fully generated.
- Midjourney does not write C2PA credentials (as of August 2026), but it does set the same IPTC value
trainedAlgorithmicMedia, along with the prompt and job ID in the EXIF/IPTC fields.
The plugin reads this data on upload and suggests a status from it – together with a confidence value between 0 and 1 that expresses how certain the finding is. Suggestions that aren't applied automatically collect in the review queue:
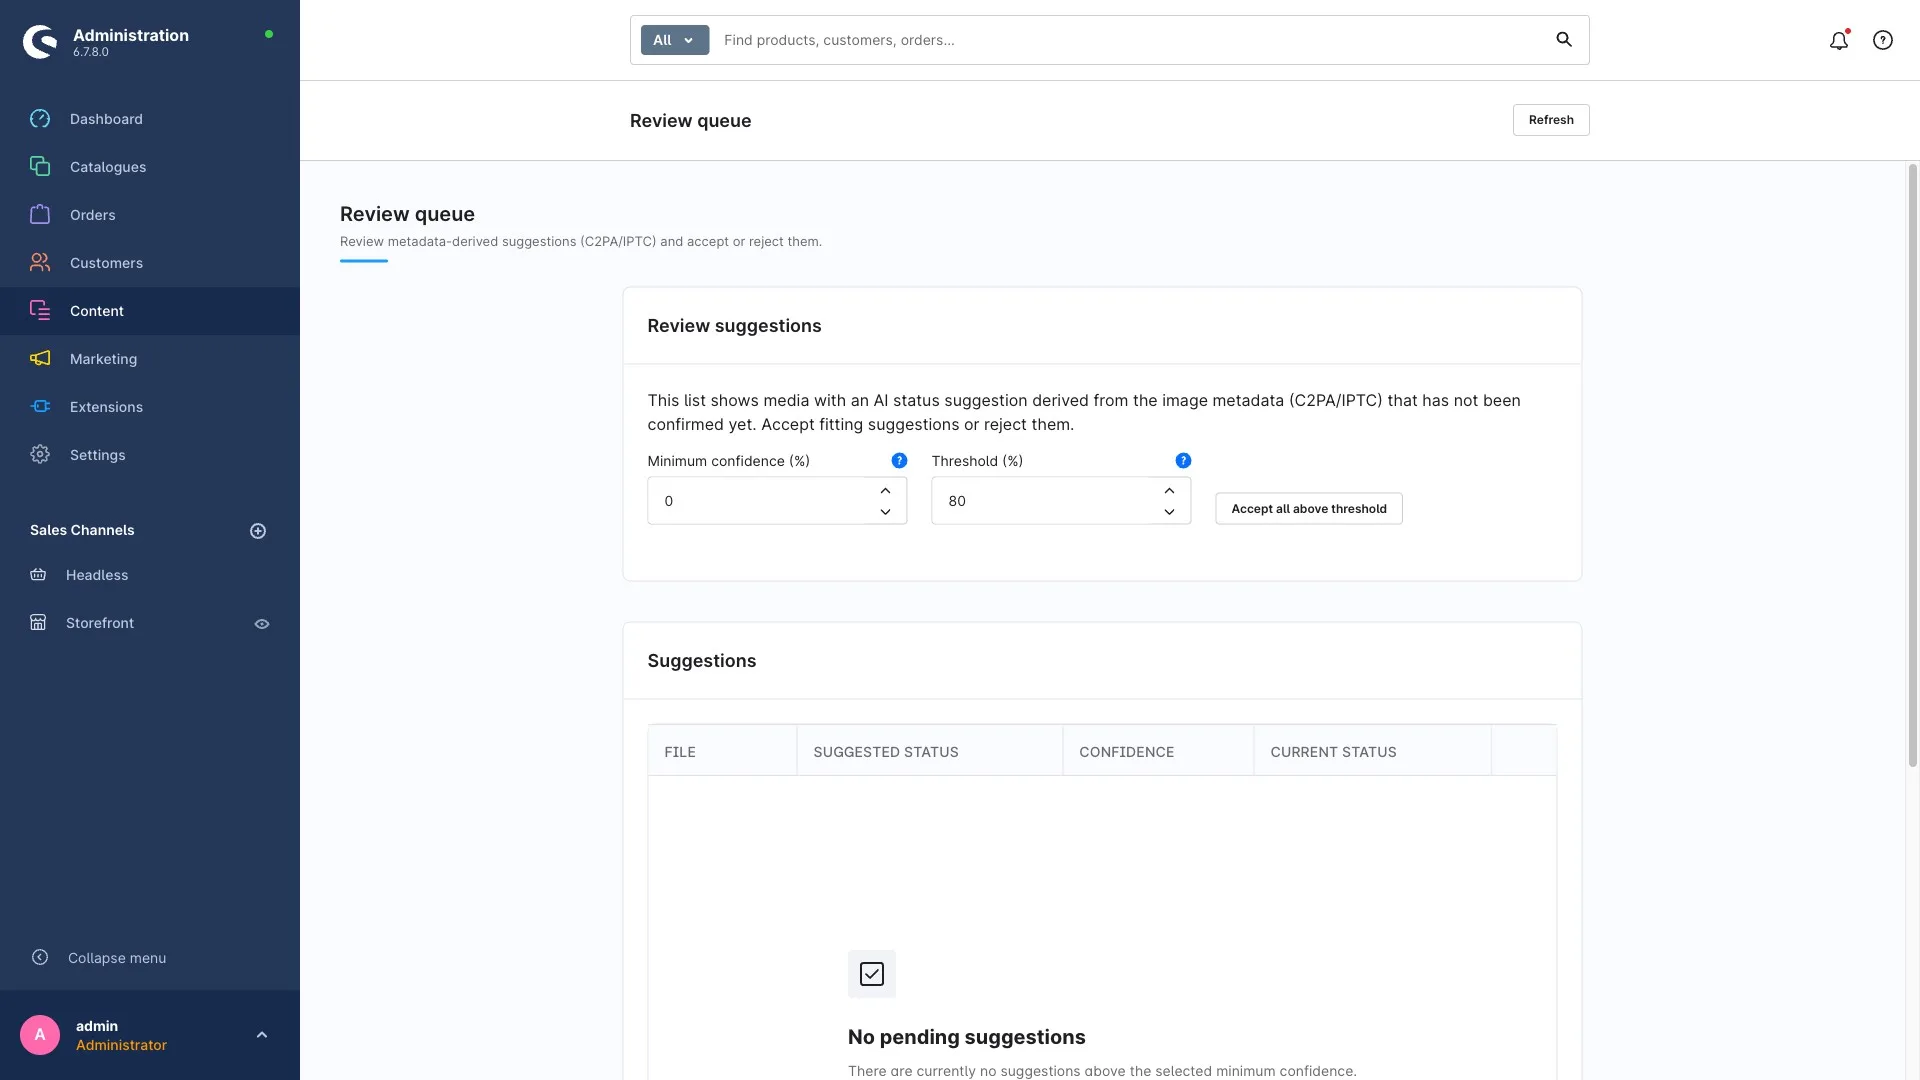
You can filter by minimum confidence, accept or reject each row individually – or work through the lot with "apply all above threshold". If you like, you can enable automatic acceptance above a threshold in the configuration (default: 80%, switched off); anything below stays a suggestion.
One caveat we state deliberately: we do not do AI-based image recognition that guesses whether something "looks AI-made". That would be unreliable, and it would take away a responsibility that legally stays with you. We only read what the generating tool documented itself. And even that isn't watertight: metadata gets lost during exports, resizing, or when images pass through certain image pipelines. The scan is a strong assist, not a substitute for your decision.
Top tip
Start with the metadata scan before you sort folders. In our experience it finds a chunk of your AI images on its own – and at the same time it shows you which tools were actually used in your shop. After that you know far more precisely which folders you still have to go through by hand.
What your customers end up seeing
Once a status is set, the rest happens without you. The badge appears everywhere it matters: in the listing, in the product gallery on the detail page, in the image zoom, in shopping experiences (CMS images and sliders) and on video elements, including embedded YouTube and Vimeo videos. That's exactly what the regulation asks for: the notice has to be there at first exposure – and in a shop, first exposure is usually the tile in the listing, not the product page.
On top of that, a product-wide disclosure on the detail page summarises which content types this product contains under an AI label: images, video, audio, text. That's also where audio shows up.
Configuration: a badge that fits your shop
The most common objection we hear isn't legal, it's aesthetic: "I don't want a garish foreign label slapped across my product photography." Fair enough. That's why practically every detail is configurable – and configurable per sales channel:
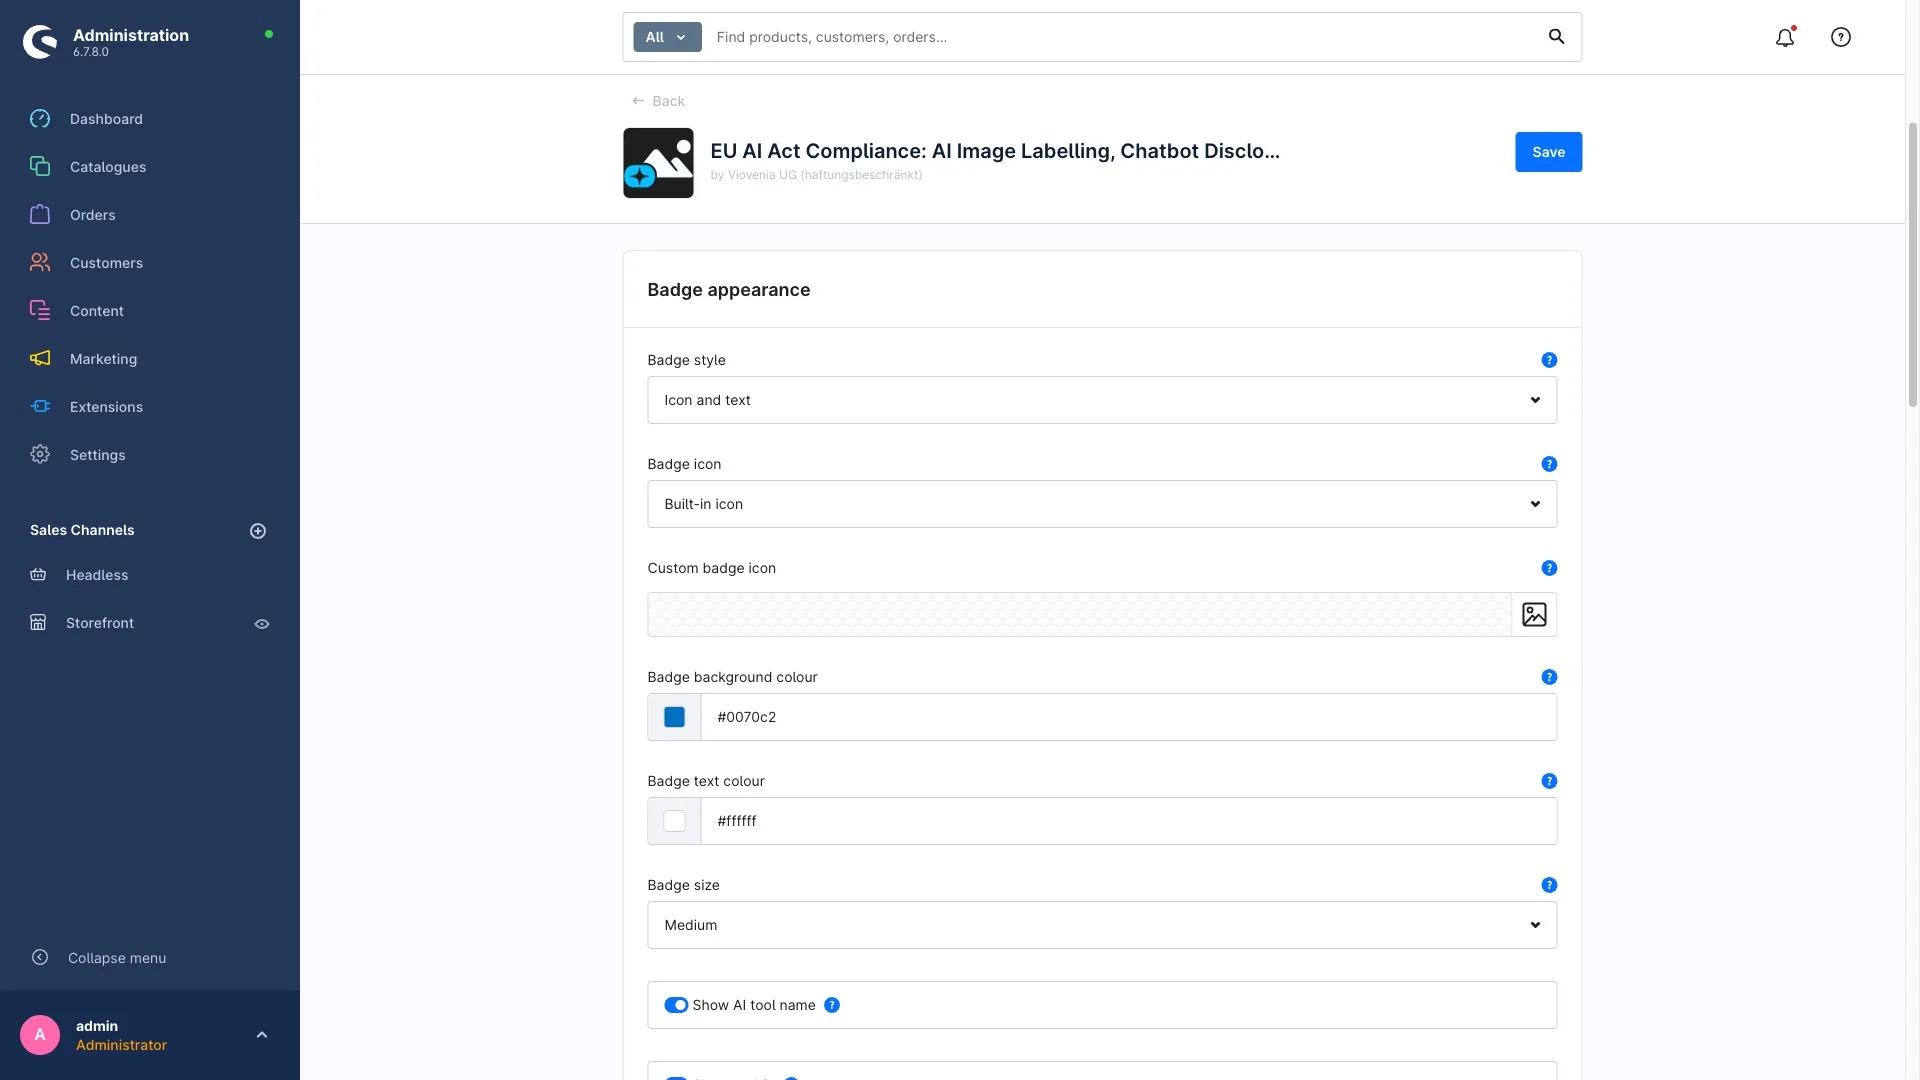
- Style: icon, text, or both.
- Icon: the built-in icon – or your own icon from the media manager (image or SVG).
- Texts: a general badge text plus optional custom texts per status.
- Colours and size: background and text colour freely selectable, size small/medium/large.
- Tooltip: your own hover text, optionally including the AI tool used.
- Position: top left, top right, bottom left or bottom right on the image.
- Visibility per placement: toggle separately for listing, detail page, shopping experiences, video and audio.
- Status scope: which statuses trigger a badge at all (default: AI-generated and AI-manipulated).
The fact that all of this applies per sales channel is more than cosmetics: your domestic B2C shop, your B2B channel and an international channel can have completely different requirements and designs – and they can have them.
The default colours are deliberately chosen to meet WCAG AA contrast, and the badge is click-through so it never blocks the path to the product page. If you set your own colours, please watch the contrast. A transparency notice nobody can read doesn't do its job – legally or practically.
Compliance tools rarely fail on technology. They fail because they make day-to-day work more annoying. So our benchmark while building this was simple: after setup, nobody on the team should have to think about labelling again.
Your plan for the afternoon
| Time | What you do |
|---|---|
| 30 min | Run the metadata scan, review the queue – get an overview of which AI images even exist. |
| 30 min | Sort your media folders: AI images into a dedicated folder, leave the rest. |
| 15 min | Run folder labelling, mop up the remaining cases via CSV or individually. |
| 15 min | Create folder defaults so new uploads run automatically. |
| 45 min | Configure the badge per sales channel: style, colours, position, visibility – and verify in the storefront. |
| 15 min | Enable the coverage warning so you get notified when unlabelled media pile up. |
After that, ongoing effort is close to zero. New AI images land in the right folder and are labelled automatically; anything unusual surfaces in the review queue or the coverage warning. And should anyone ask – a competitor, a trade association or an authority – the plugin logs every status change without gaps and exports an AI register as PDF or CSV at the push of a button.
Sources
Every legal statement in this article can be checked against the original (as of August 2026):
Bottom line: set it up properly once, then let it run
Labelling AI images isn't a project, it's a configuration task – provided you tackle it in the right order: first understand which status applies when, then label your existing library in one sweep, then arm the automation for the future. The mistake we see most often is the reverse: patching images one by one until motivation runs out – and three months later the shop is half unlabelled again.
That's exactly why we built our EU AI Act Compliance plugin: four clear statuses, four routes to bulk labelling, a fully configurable badge per sales channel, and evidence you can export. Everything runs locally in your shop – no external services, no extra cookies. The details are in the plugin documentation. The plugin is now available directly in the Shopware Store.
Small but important note: this article reflects our practical view as developers and is not legal advice. How you apply the four statuses to your specific image library is something to clarify with your lawyer if in doubt.
Not sure how many AI images are hiding in your shop, or do you need something custom on top – a connection to your PIM, or a bespoke Shopware plugin for your workflow? Let's spend 20 minutes looking at your media library together in a free initial consultation. We'll tell you honestly how big the job is – and whether it's an afternoon or closer to two days.