
Pitching Set
How to Make App Store Screenshots: Getting Started
Last updated:
With Pitching Set, you go from first launch to finished App Store screenshots in a few steps. This chapter also shows how to manage apps, projects, sets, and images. The sample project is the fastest way to see how to create App Store screenshots.
First launch
On first launch, Welcome to Pitching Set appears as a single sheet with three ways forward.
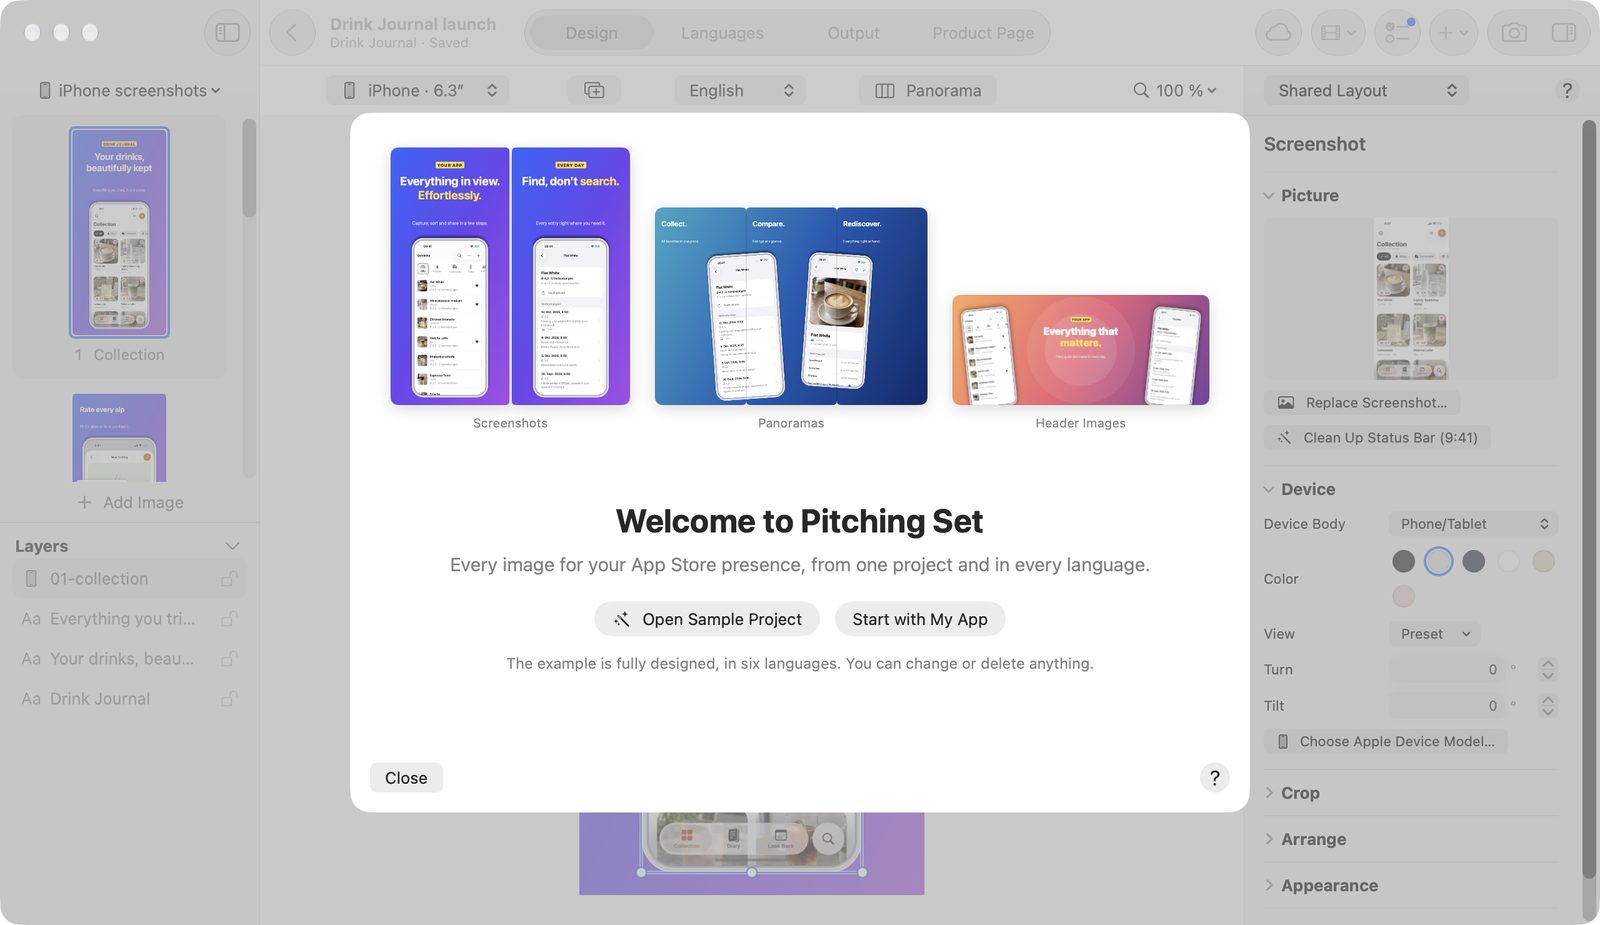
- Open Sample Project creates a finished project translated into German, English, French, Spanish, Italian, and Japanese. Everything is ready in Output right away.
- Start with My App asks What Is Your App Called? and leads to Choose a Template.
- Skip closes the sheet.
Later, you open the sheet from Help → Welcome to Pitching Set, or in Settings under General with Show Welcome Again.
From your app to finished screenshots
- In the sidebar, click New App.
- Click New Project (⌘N). The template gallery opens.
- Choose a template under Ready-Made Sets or Single Templates.
- Set Format, Source Language, and Colors.
- Click Create or double-click the template.
- Drag screenshots from the Finder onto the image areas or click Choose Screenshots…. With several images, Assign Screenshots opens: Pitching Set proposes the empty image areas in name order, and you confirm.
- Above the canvas, click Add Format… if you need more formats, such as iPad or Mac. The set keeps its texts and screenshots.
- Press ⌘2 to go to Languages and click Add Language….
- Choose the languages and confirm. With Pro, Translate missing texts right away with Apple Translation translates immediately; otherwise you type the texts yourself.
- Press ⌘3 to go to Output and fix whatever shows as a problem.
- Click Export… to save the PNG files.
With Pro, click App Store Connect in the toolbar next to compare languages, texts, and screenshots. See App Store Connect.
Keep track with Next Steps
Next Steps in the toolbar shows what's still missing in the current set and takes you there. A dot on the button means a measurable step is still open.
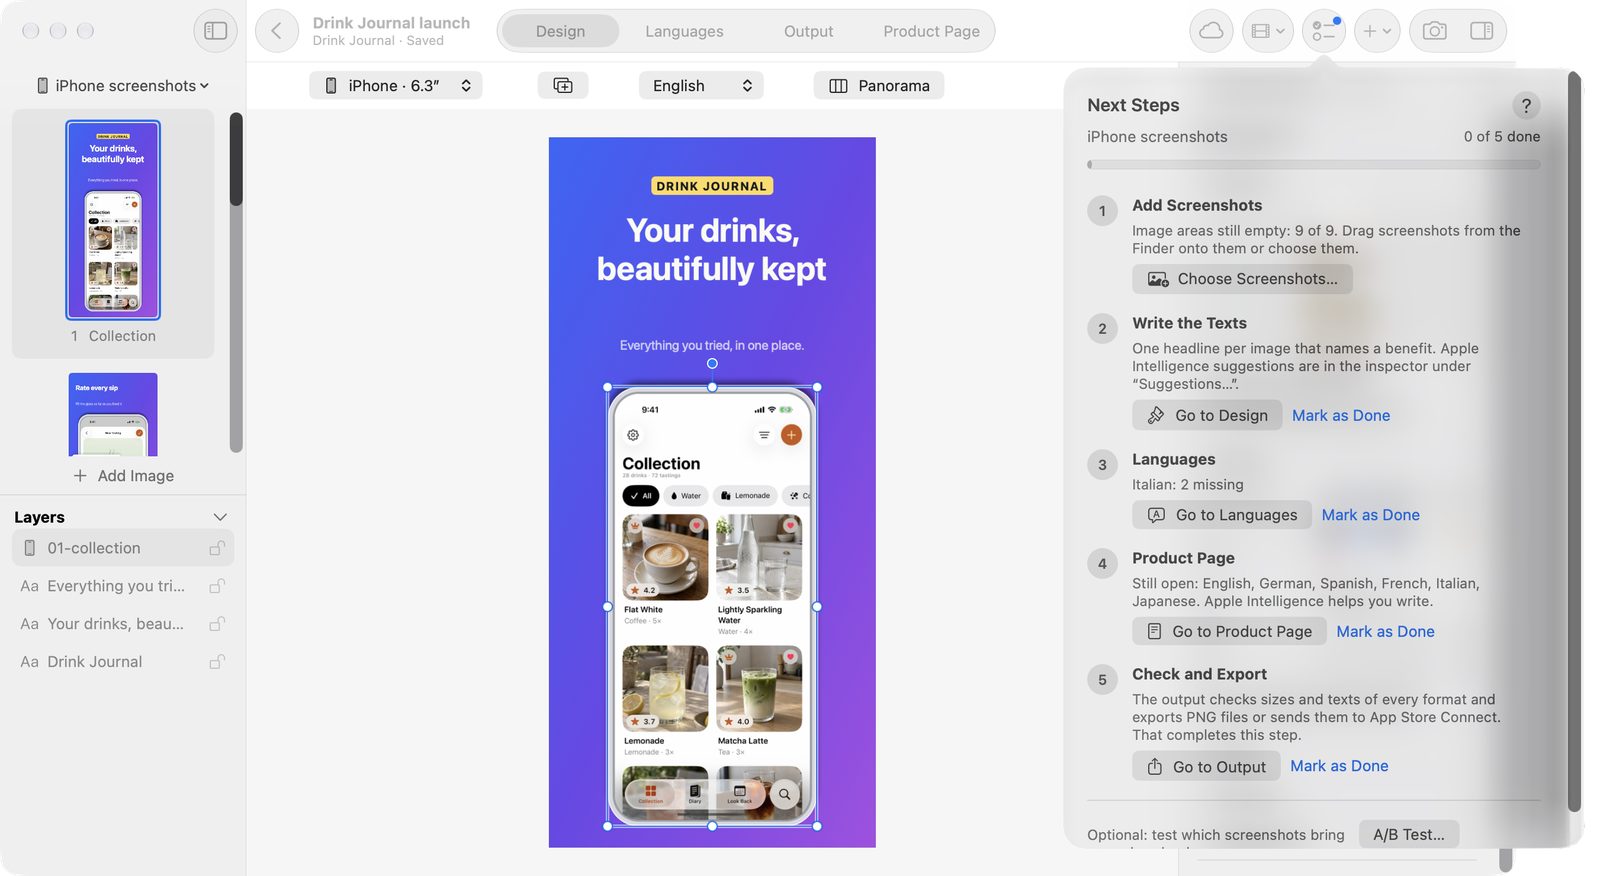
| Step | What it shows | Button |
|---|---|---|
| Add Screenshots | How many image areas are still empty | Choose Screenshots… |
| Write the Texts | A pointer to text suggestions | Go to Design |
| Languages | Missing texts per language | Go to Languages |
| Product Page | Required fields per language | Go to Product Page |
| Check and Export | State of the outputs | Go to Output |
If you took care of a step another way, tick it with Mark as Done; Not Done After All takes that back.
Manage apps
An app groups your projects in the sidebar. It doesn't need a connection to App Store Connect.
Create an app
- At the bottom of the sidebar, click New App.
- Enter the name under App Name.
- Click Create.
You can connect App Store Connect later. From App Store Connect… imports apps from your account. If the app already exists locally, it gets connected instead of created twice.
An app's context menu
-
Rename… changes the name.
-
Remove App appears only for an app without projects.
-
Connect to App Store Connect… or Choose Another App in App Store Connect… sets the link.
-
Disconnect removes it. After that, Pitching Set no longer connects this app on its own.
Manage projects
The project overview shows the selected app's projects as cards with large previews, date, and storage used. If a project's file is missing, the card says so.
The header names the app, its icon, and its connection state. Its menu offers Reload, Choose Another App…, and Disconnect. A connected app shows the icon of its latest build.
| Action | How |
|---|---|
| Open a project | Double-click or press Return |
| Select | Click, arrow keys; ⇧ extends, ⌘A selects all |
| Search | ⌘F (Search Projects) |
| Sort | Sort → Last Opened or Name |
| Preview | Space shows the most recently used images in Quick Look |
| Move to the Trash | ⌘⌫ or Move to Trash |
| Add a project file | Import Project… (⌘O) or drop the file |
A card's context menu also offers Open, Rename…, Duplicate, Export Project…, Show in Finder, and Move To. That last one moves the project under another app. If the file is missing, Remove from List appears.
Move to Trash doesn't ask first. ⌘Z brings the project back as long as Pitching Set is open. After that, it's in the Finder's Trash.
Automatic saving
Pitching Set saves shortly after each change in the background and before you switch project or app. ⌘S saves immediately. The window title shows Saved or Not saved.
Older project files are converted when opened; Pitching Set makes one backup first. Damaged projects are rescued as far as possible. A damaged workspace opens read-only, without changing any files.
Remove Unused Images in the File menu clears out images no image in a set uses any more. You see the space freed, and ⌘Z brings them back.
Manage sets
A set holds your images and produces all formats in all languages. The explanation What is a set? also appears in the gallery and the Sets view.
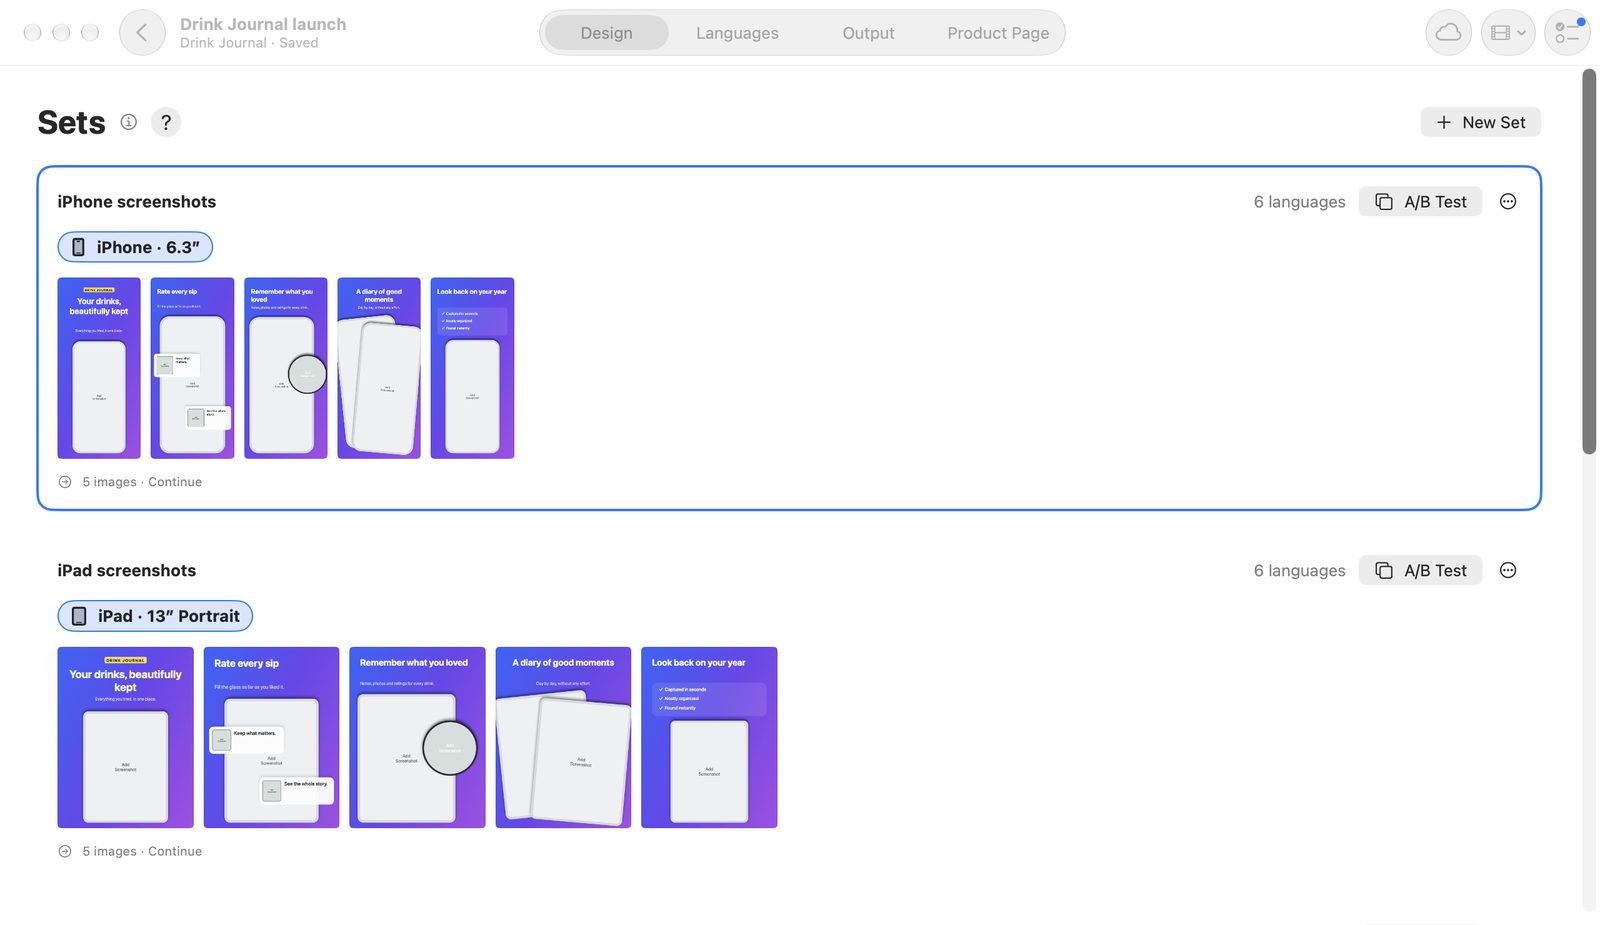
- In the editor sidebar, open Manage Sets….
- Click New Set (⇧⌘N) to create another set in the gallery.
- On a format chip, click Continue to open the set in that format.
A set's More Actions menu contains:
- Add Treatment and Compare Treatments (see A/B tests)
- Rename…
- Duplicate (⌘D) creates a separate copy right after the original.
- Move Up and Move Down (⌥⌘↑, ⌥⌘↓)
- Delete Set… (⌫). An original takes its treatments with it. You can undo all of it. A project's last set stays.
Manage images
Images are in the Images list on the left of the editor.
- Add Image (⌥⌘N) copies the image shown to the end.
- The context menu offers Rename…, Duplicate, Move Up, Move Down, and Delete. ⌫ deletes the selected image. At least one image stays.
- Dragging reorders. Panorama objects keep their place.
- A duplicate sits right after the original and keeps its device-specific layouts.
Free and Pro
Apps, projects, sets, and images are free without limit, and so is exporting the required formats in the source language. Opening the sample project is free. You need Pro for further languages and formats, translation, App Store Connect, and all templates. Pro and pricing has the details.